
How does Plume work for Caregivers?
When a Parkinson's patient uses Plume, caregivers can view 5 key data points,
bar_chart
Health Metrics
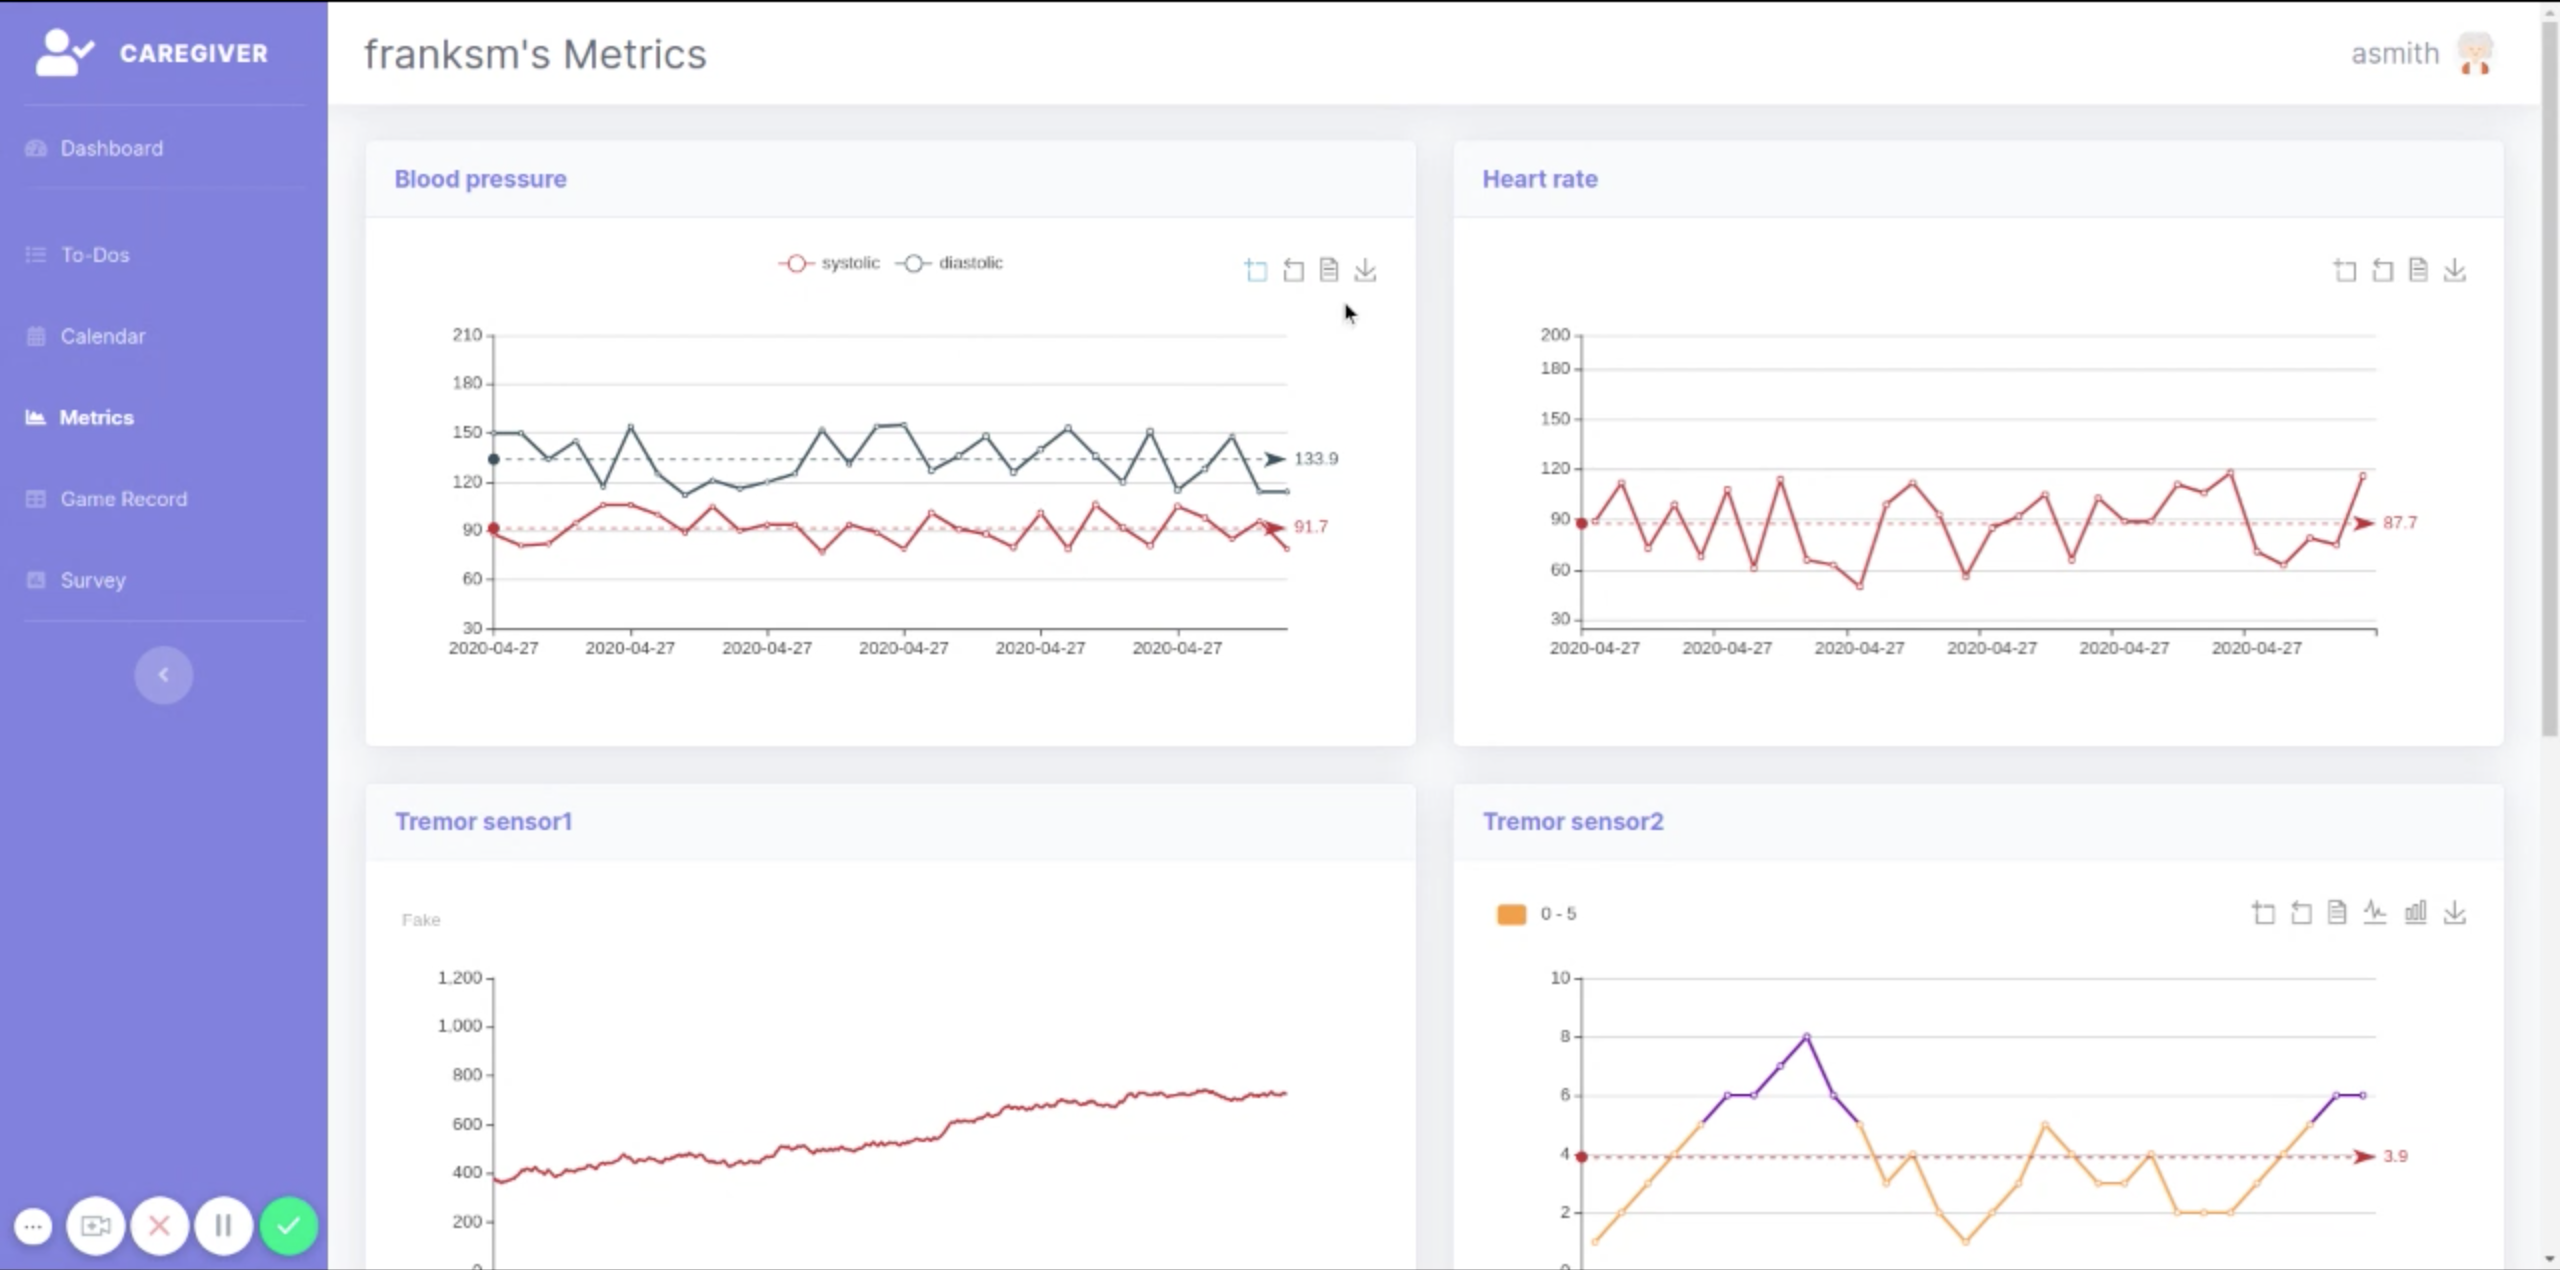
Caregivers are able to view the health metrics of patients, including heart rate, blood pressure, tremor frequency and more, in real time.
calendar_today
Calendar
Caregivers are able to view their patients' schedule and add events to make sure their patients are staying healthy and active.
question_answer
Survey
Caregivers are able to answer survey questions pertaining to their patients so that the doctors are able to view a holistic view of the patient's physical and mental well-being.
Dashboards for Caregivers
Due to Parkinson’s Disease chronic nature and unique symptom manifestation in each patient it’s important to allow doctors and caregivers visibility into symptom development overtime. Plume provides a comprehensive set of dashboards for not only patients, but primary caregivers and doctors as well.
How do I get started? expand_more
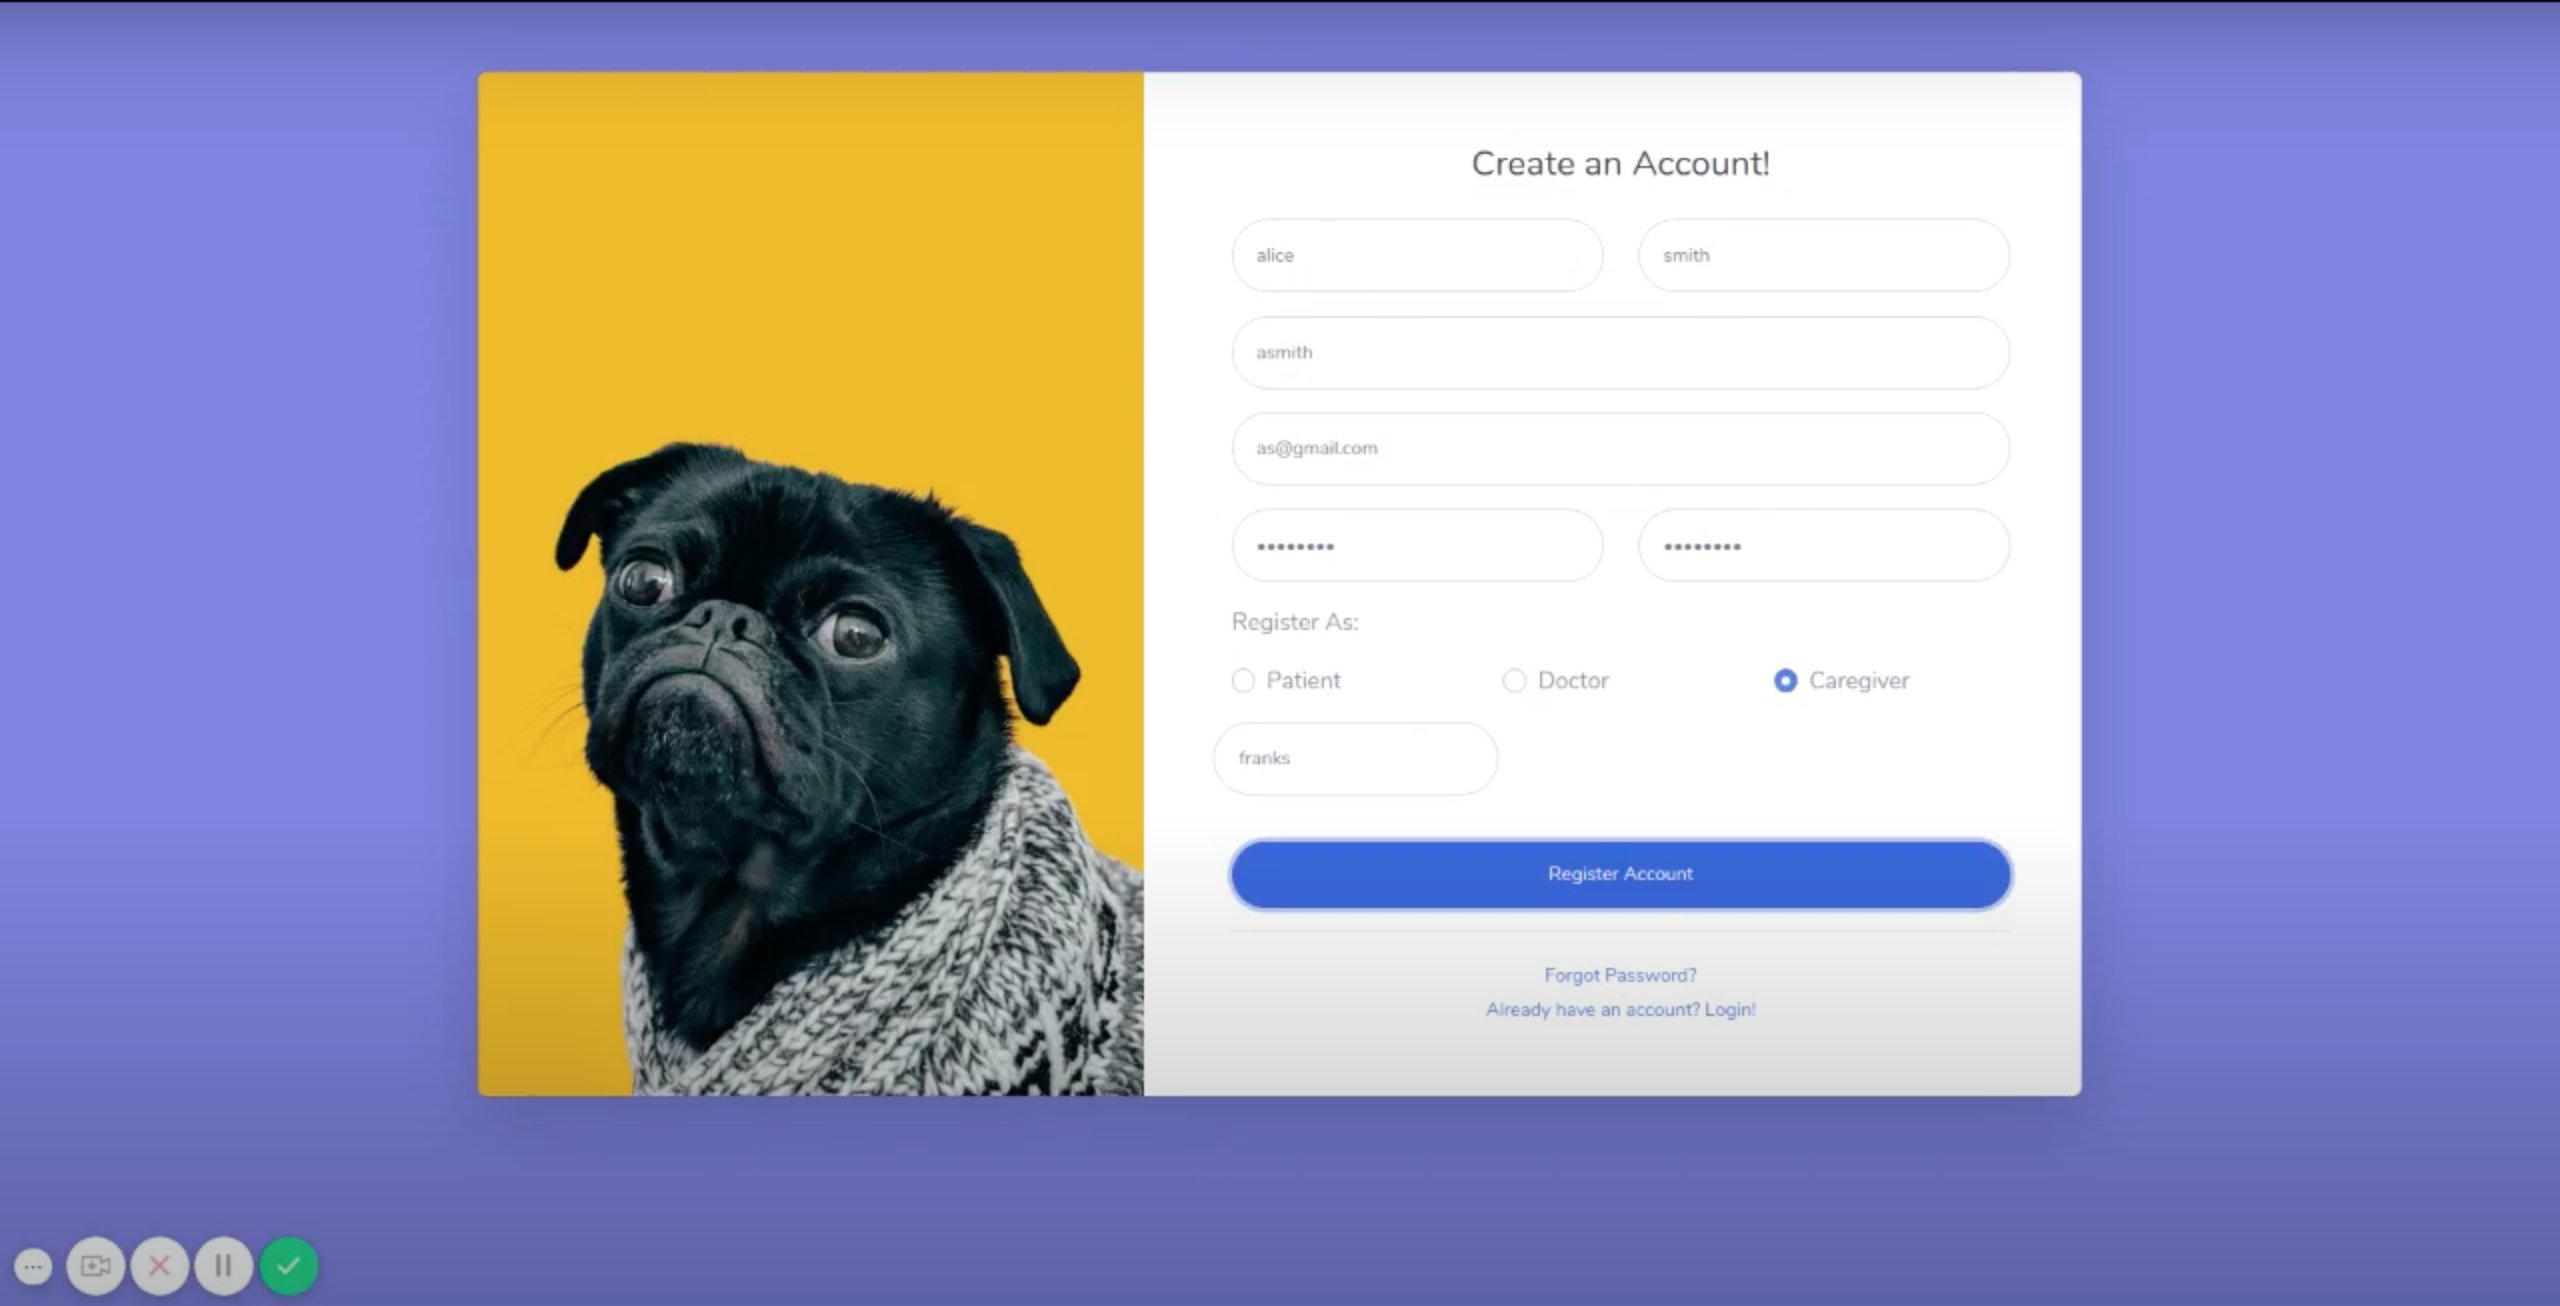
Create an Account
If you have not used the dashboard before, you will need to create an account.
Note: Your patient must create their account first, because you will need to record their username when you create your account.
Step 1
On the log in screen, at the bottom right of the white “Welcome to Plume” box, click “Create an Account”
Step 2
Fill in the necessary details to create your account.
Plume will ask for your first and last name, desired username, email address and desired password.
Choose to Register as “Caregiver”. Enter the username that your patient chose in the “Patient Username” field.
Click the “Register Account” button to register.
Please Note
We recommend that you write down your username and password on paper and store it somewhere safe and hidden, where you can find it later if you forget.
Login
Step 1
In the “Enter Username…” field, type the username you chose when you created your account.
Step 2
In the “Password” field, type the password you chose when you created your account.
Please Note
If you don’t want to have to log in next time, select the checkbox next to “Remember Me”
If you have forgotten your password, click “Forgot Password?”
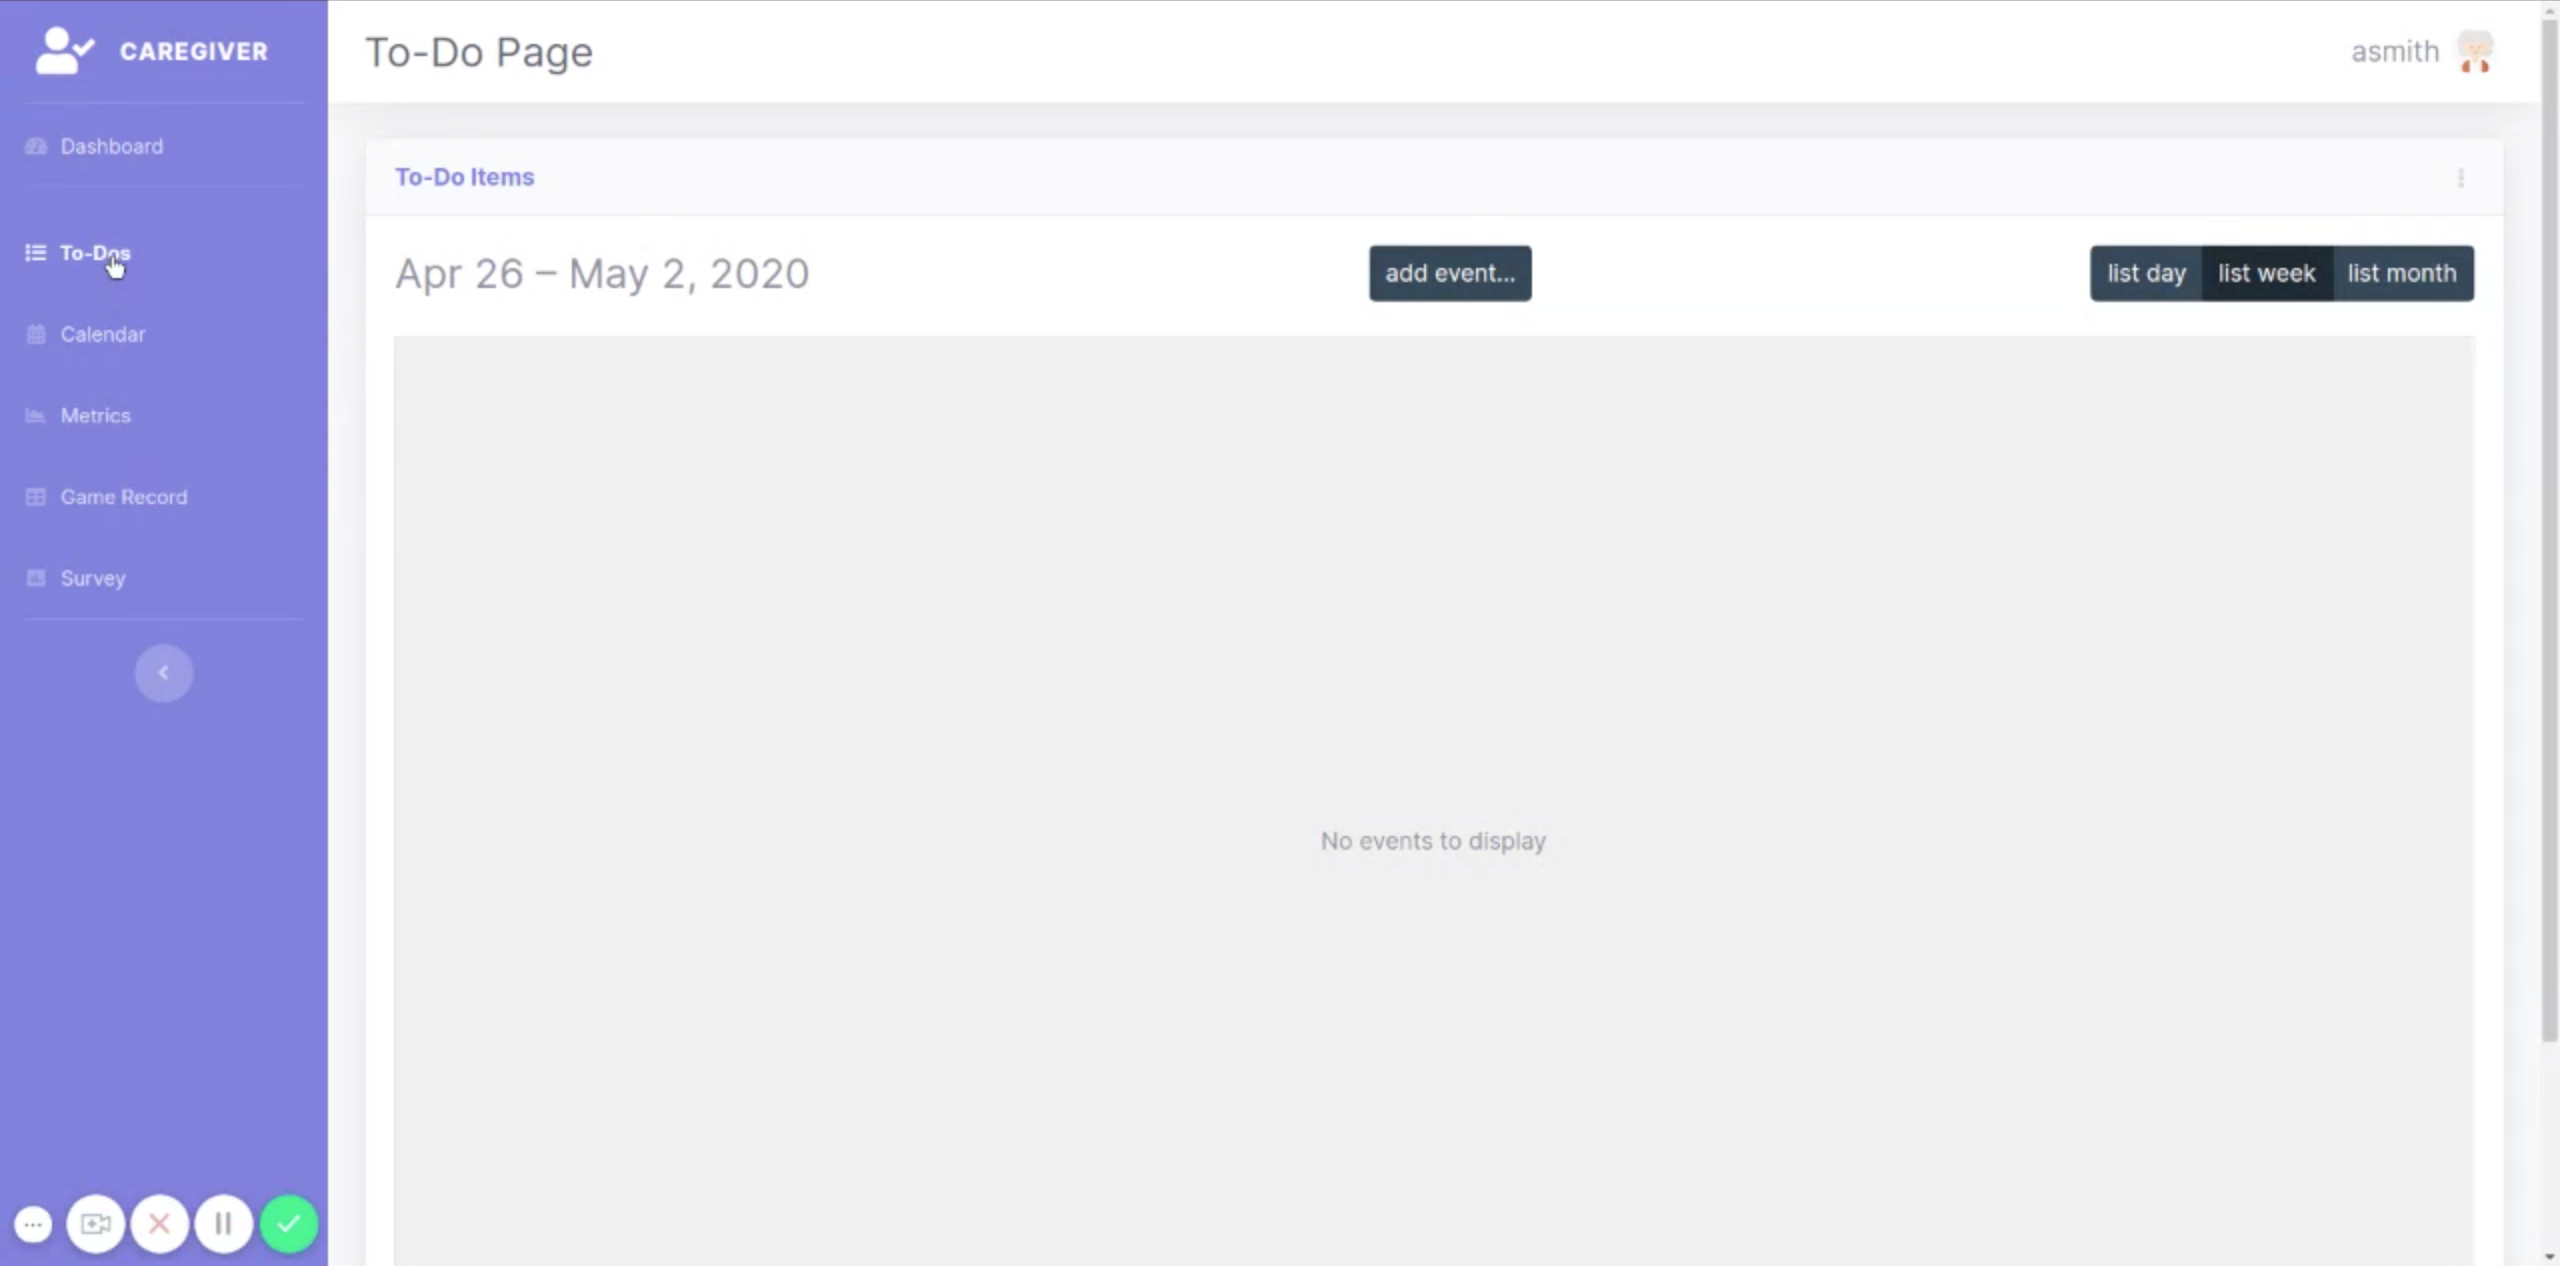
View Your To-Dos
Step 1
On the left side of the screen, in the blue vertical bar, click “To-Dos”
You can view your To-Dos for today, this week, or this month by toggling through the buttons located at the top right corner of the screen.
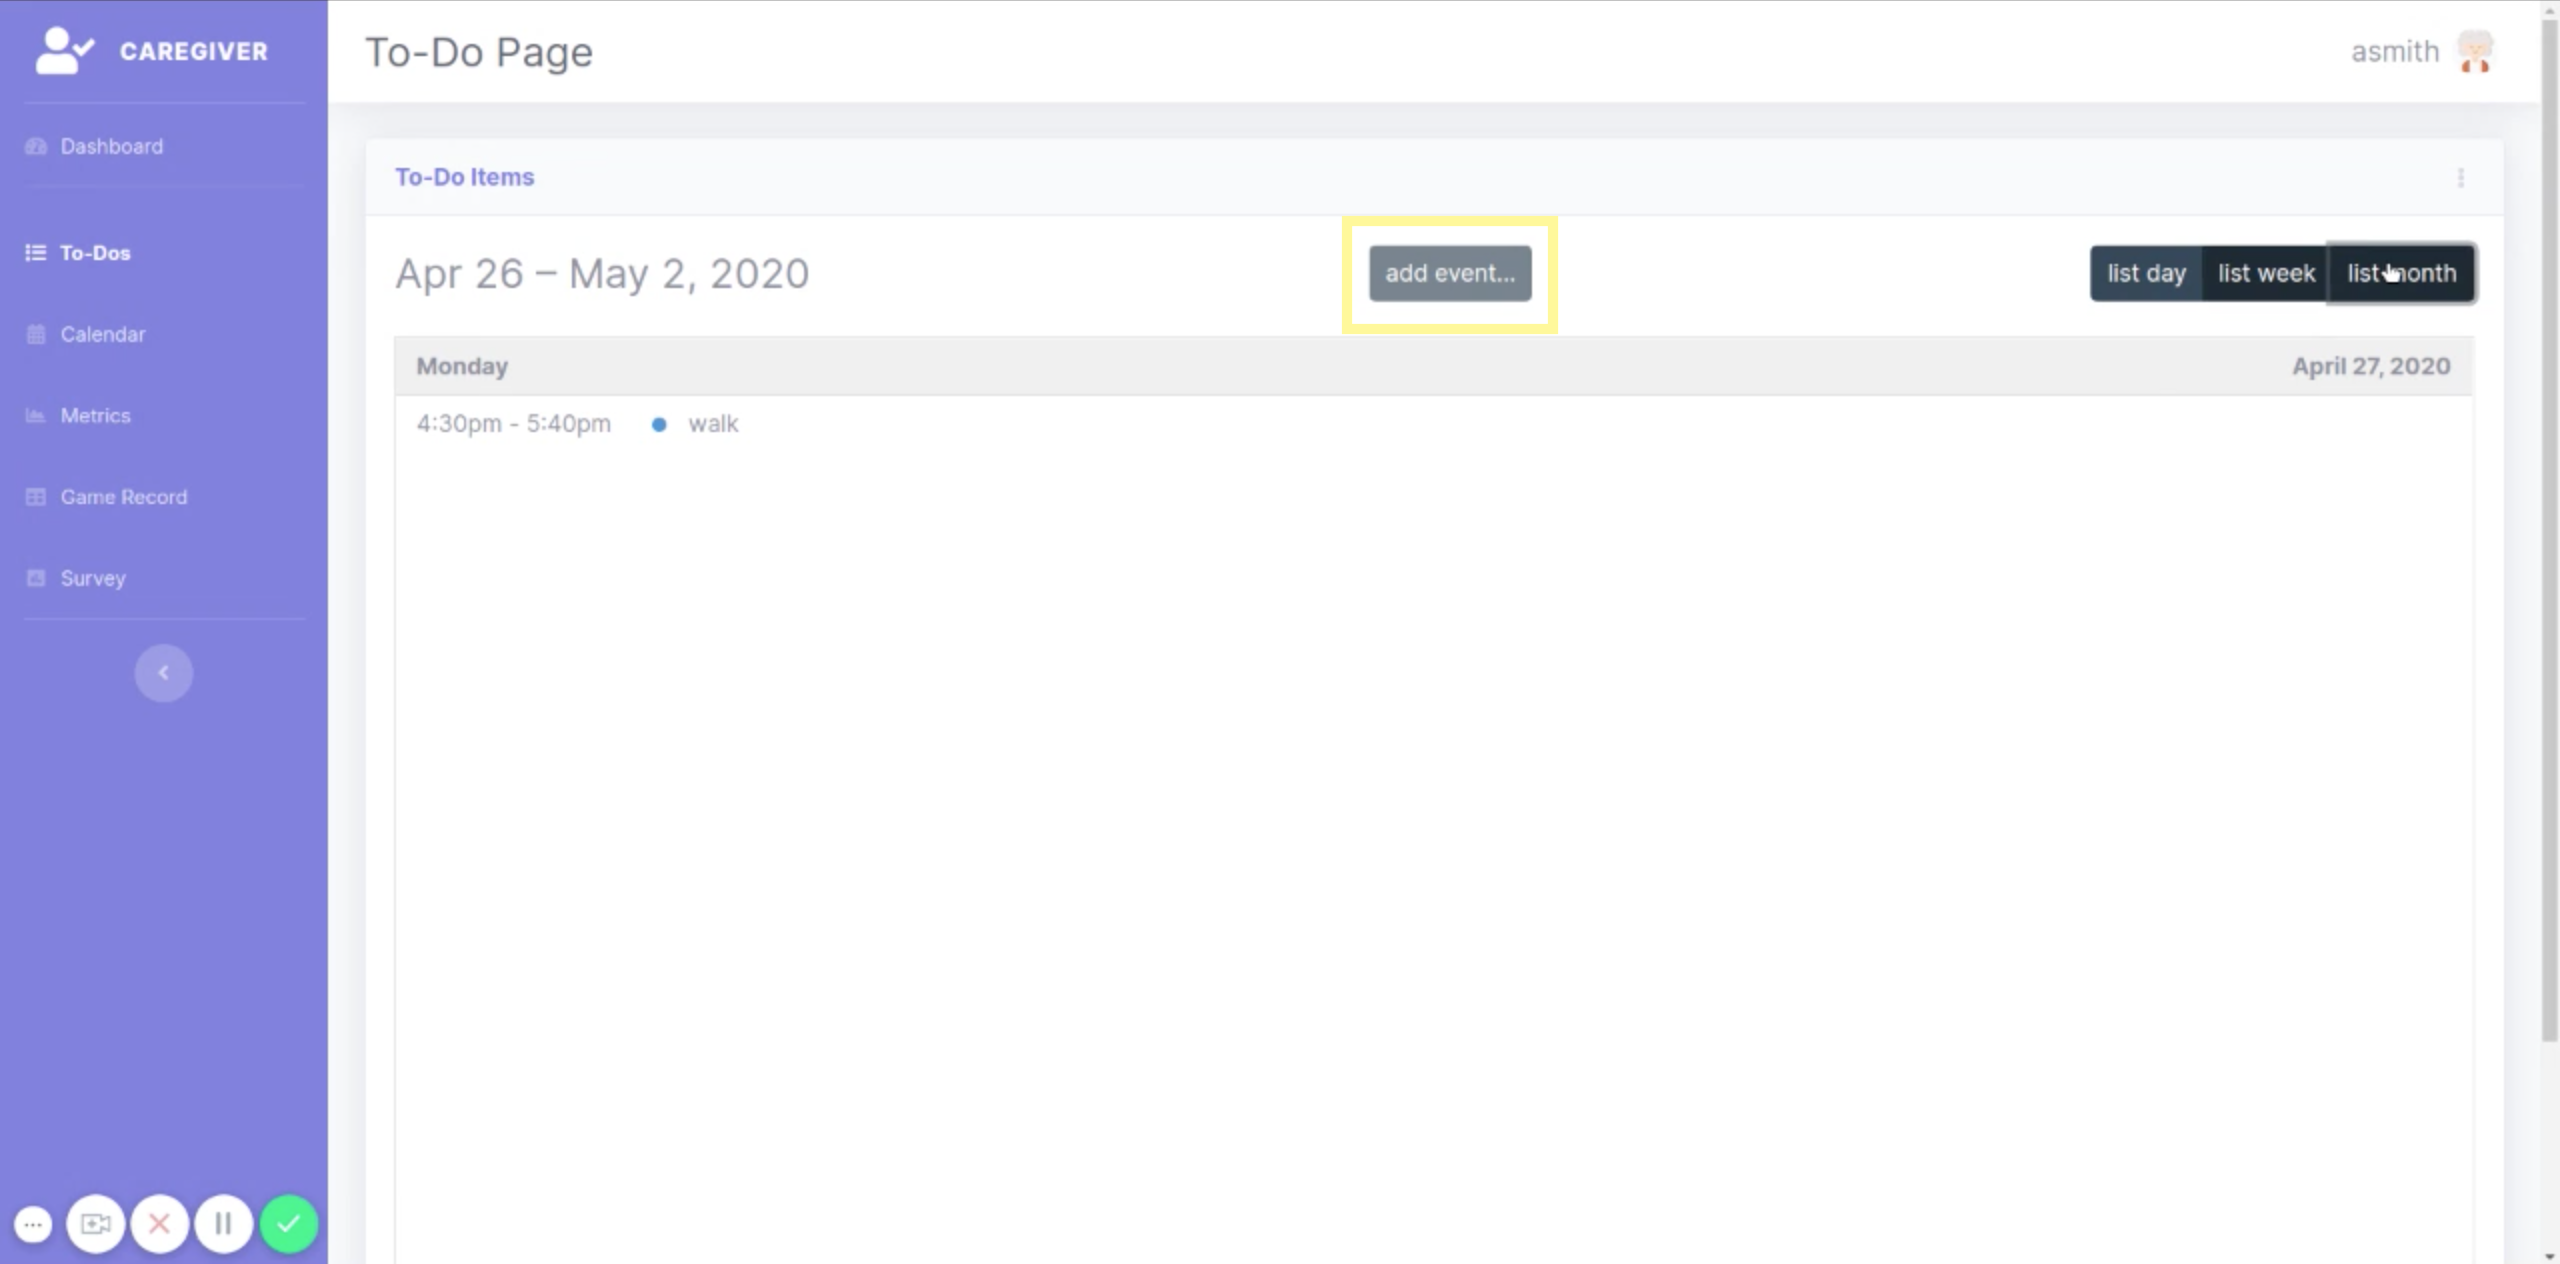
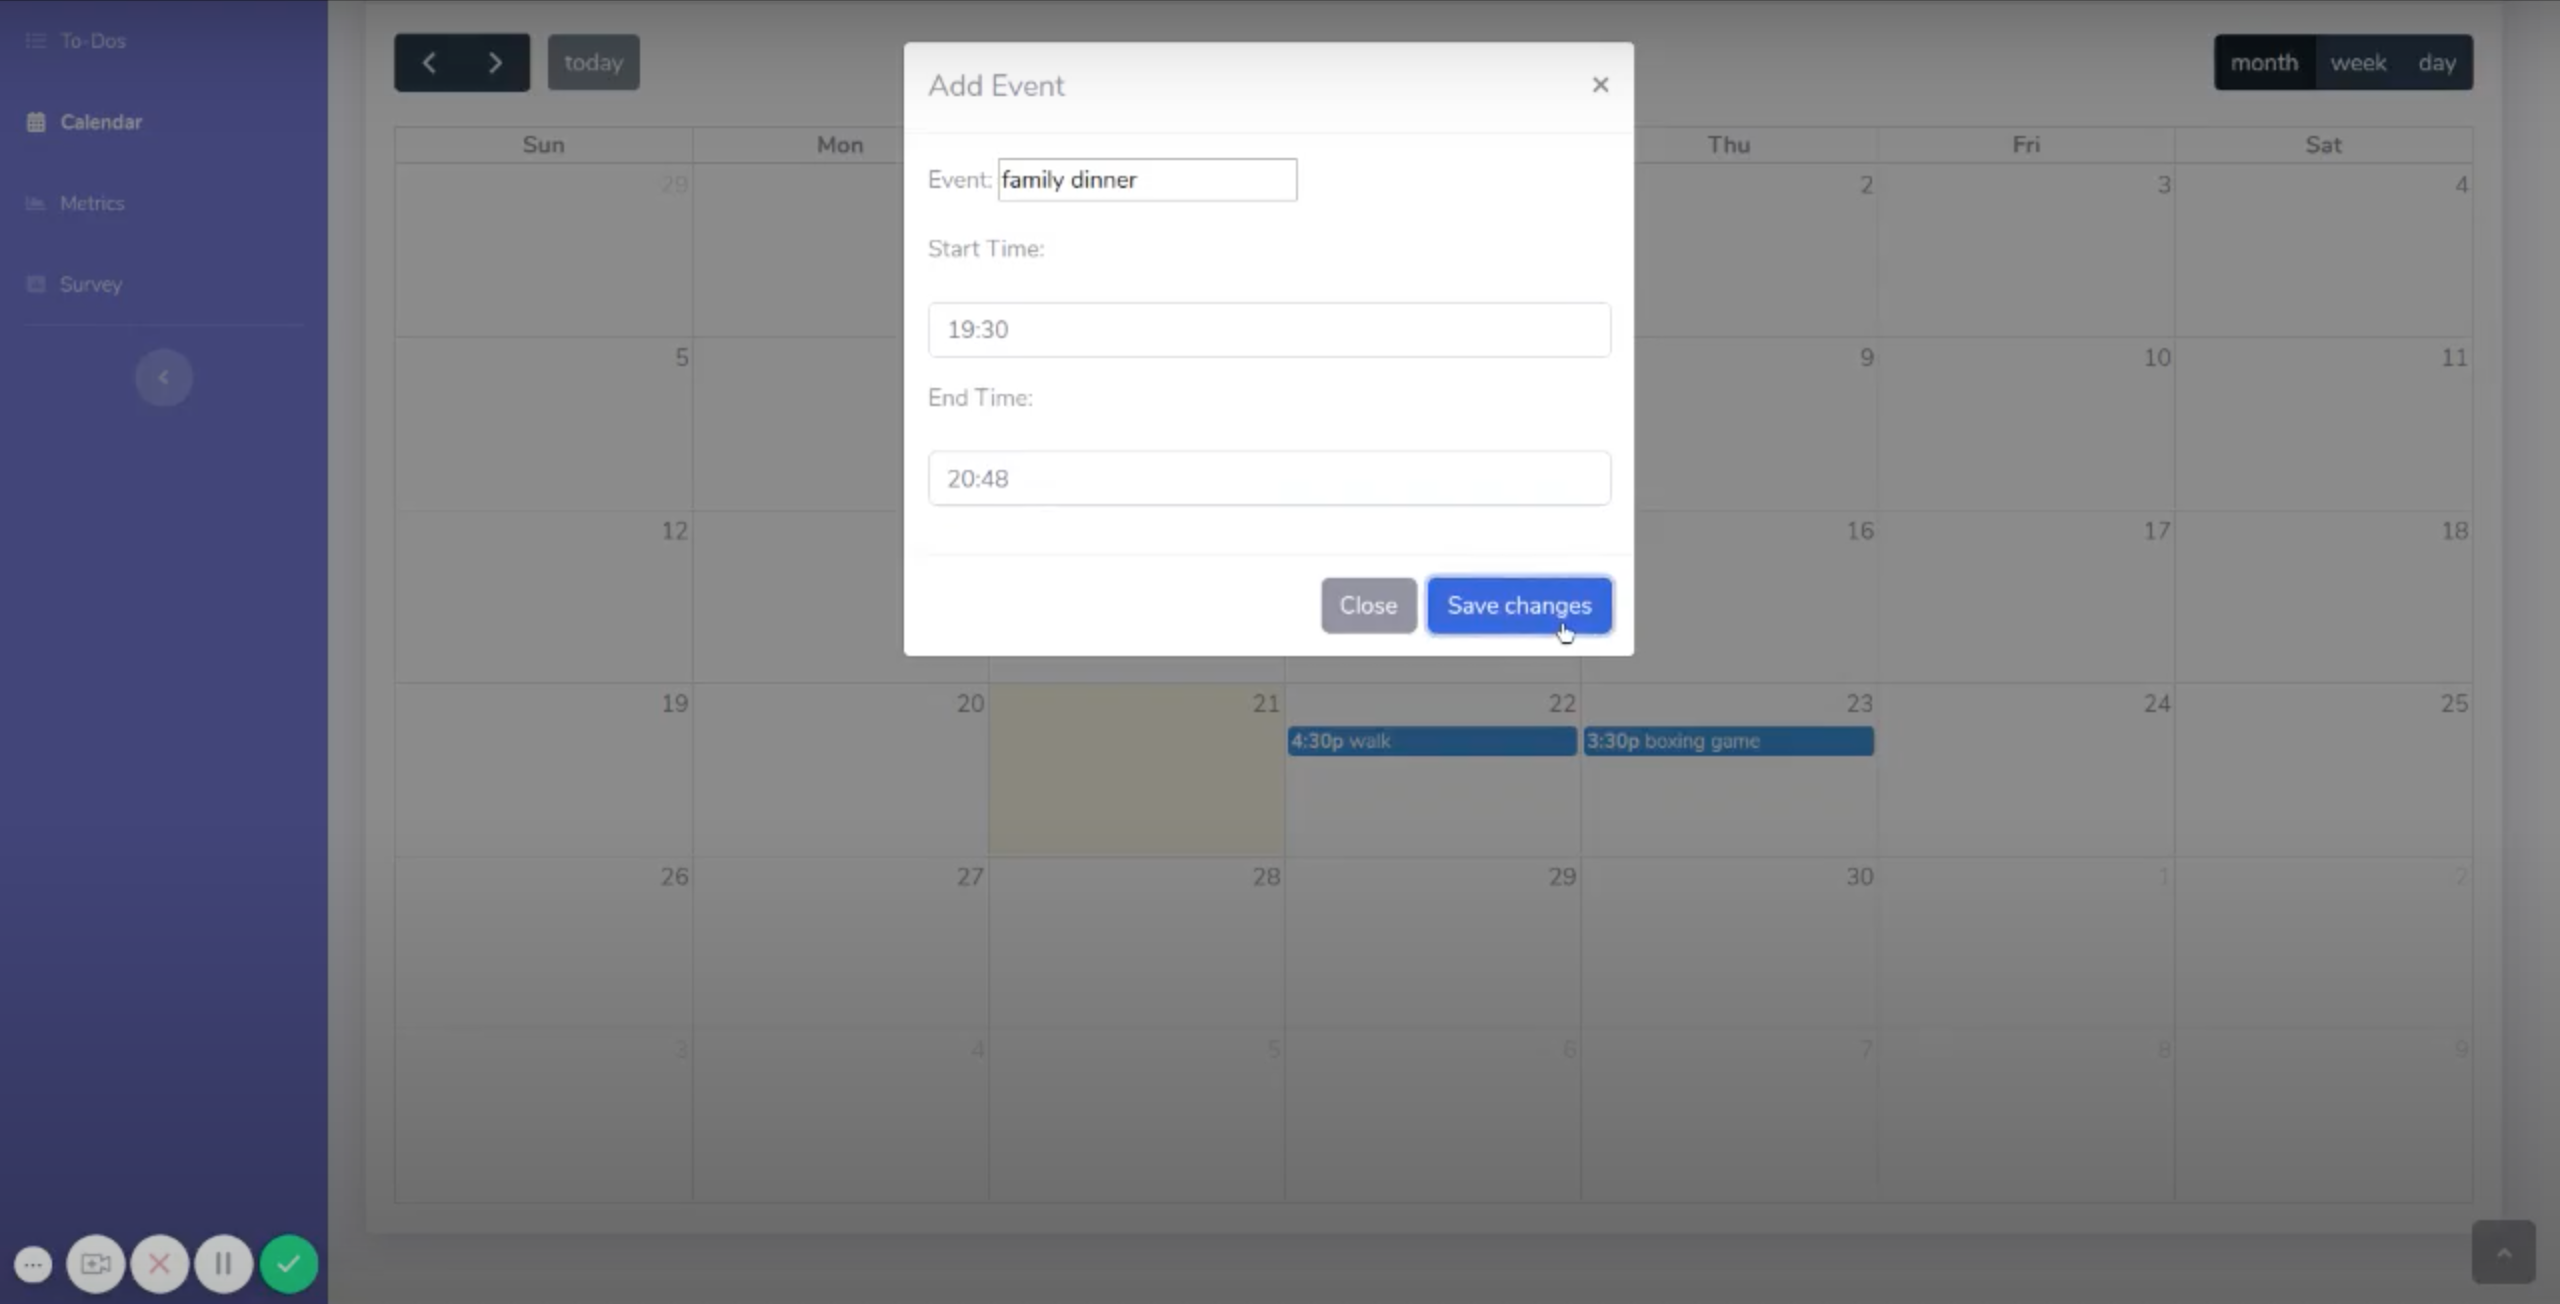
Set an Event
Step 1
At the center of the screen, click the gray “Add event…” button.
Step 2
In the field next to “Event:”, write a name for the event you would like to add.
Step 3
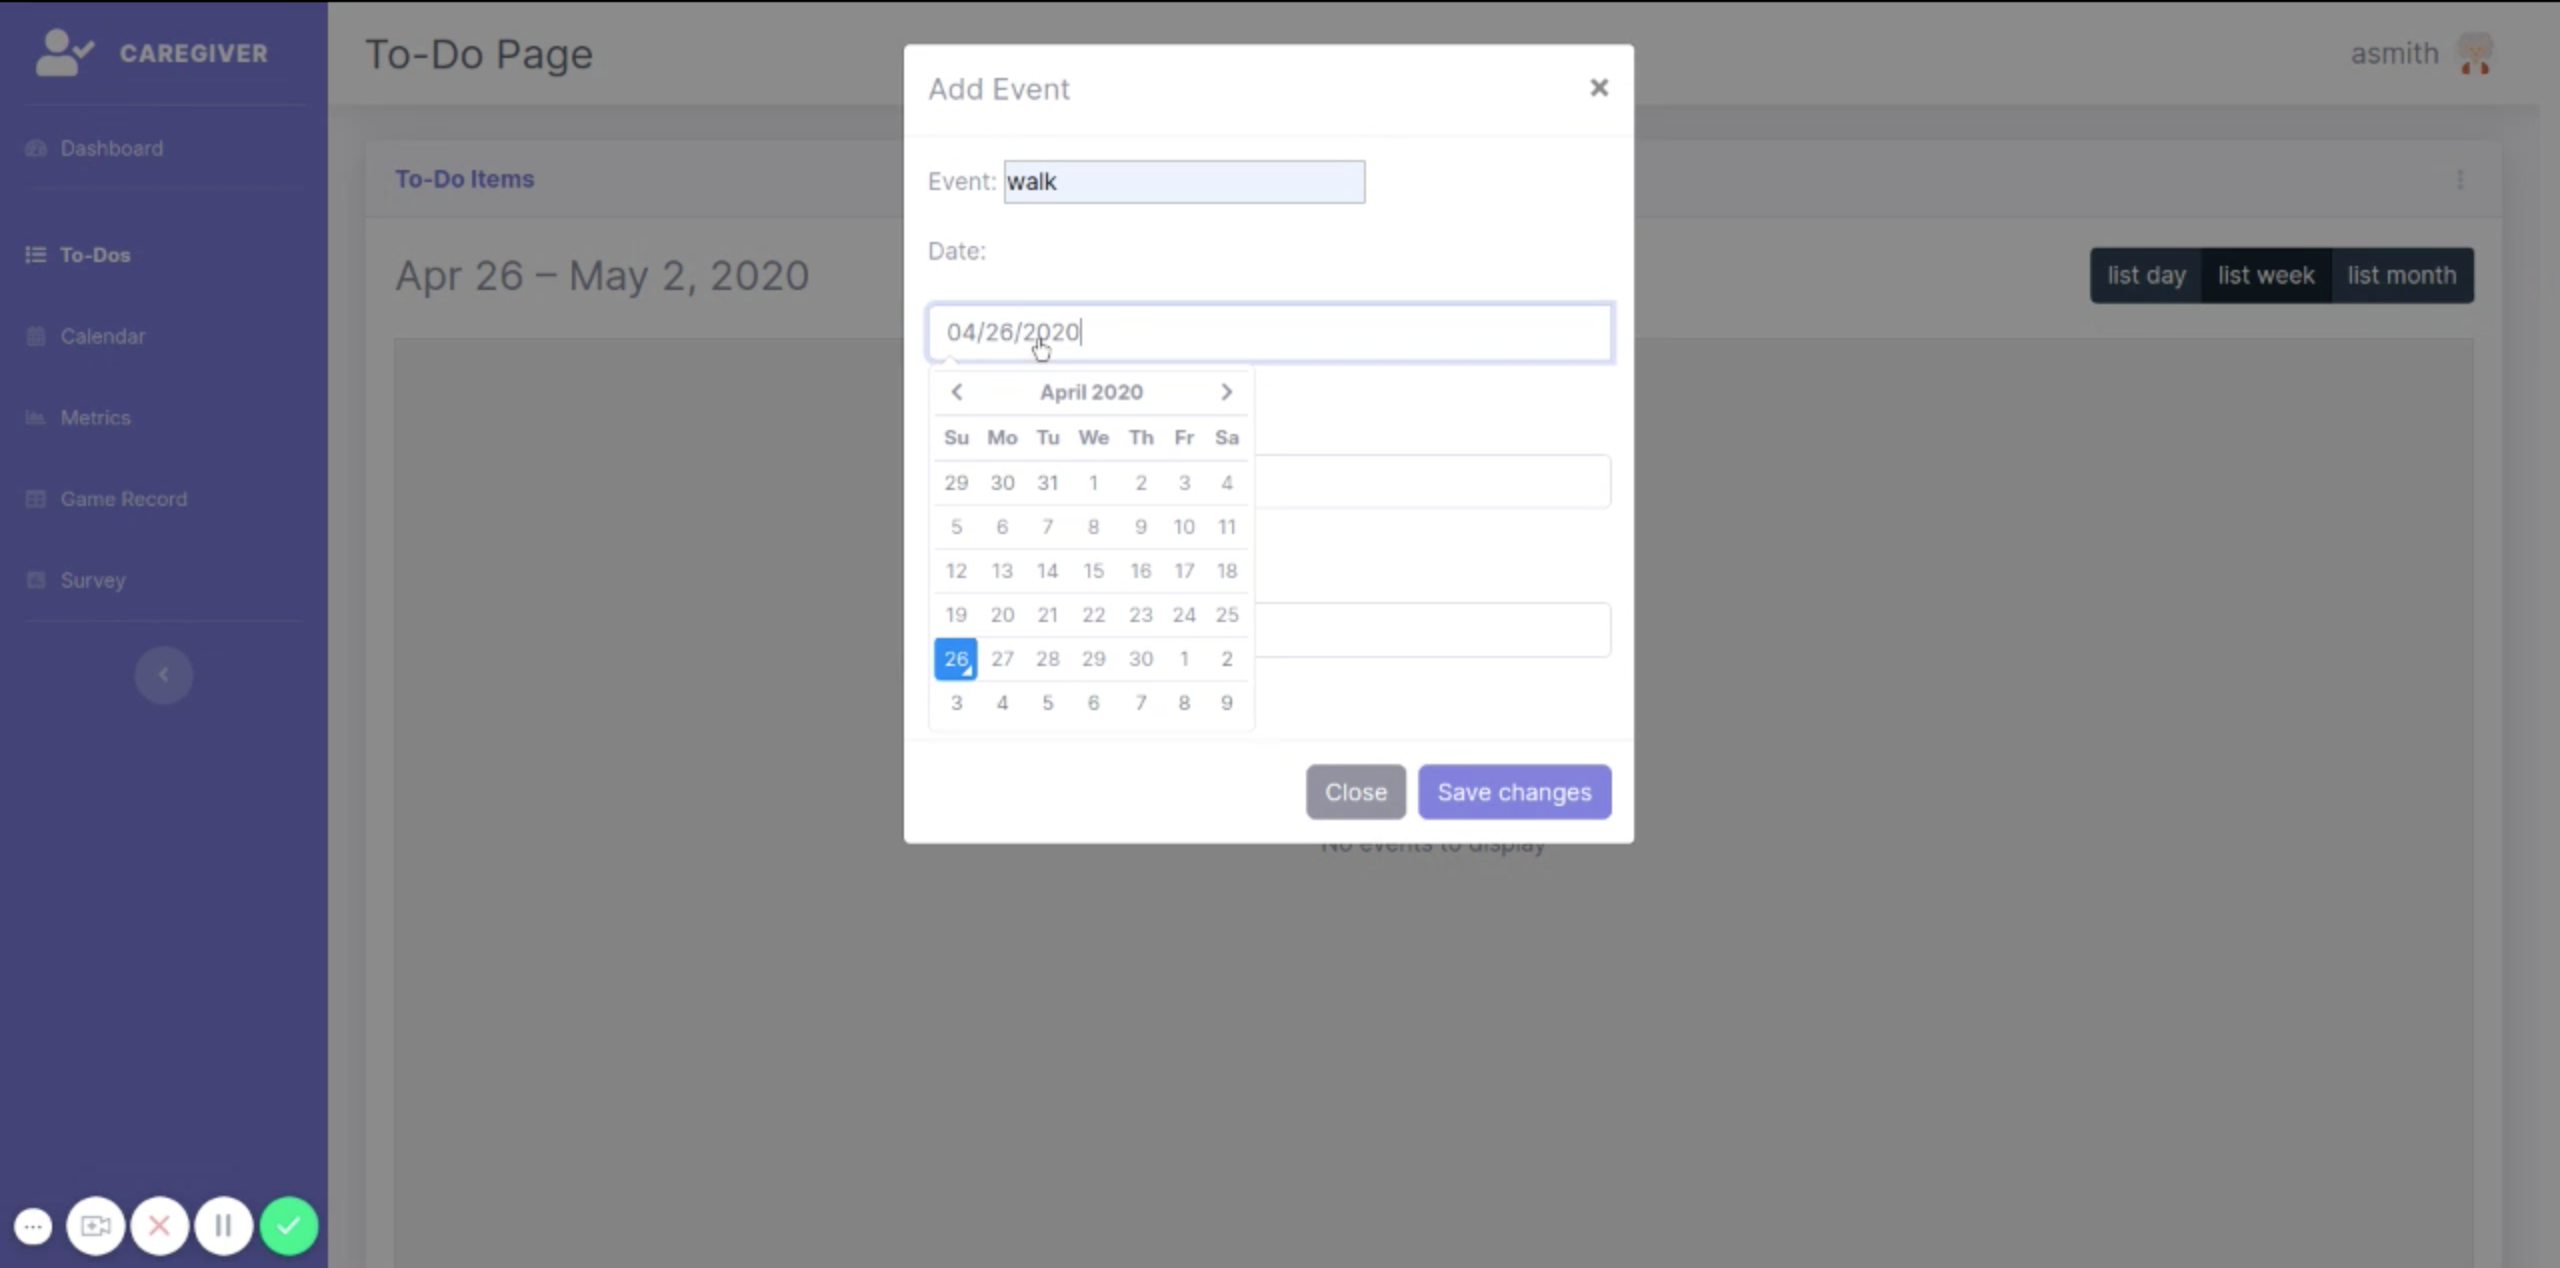
In the field below “Date:”, enter the date of the event you would like to add by doing the following:
Click the field.
In the calendar popup, click the date for which you would like to schedule an event.
If you wish to change the month displayed, click the arrow at the top right of the popup to move ahead a month, or the arrow at the top left to move back.
Step 3
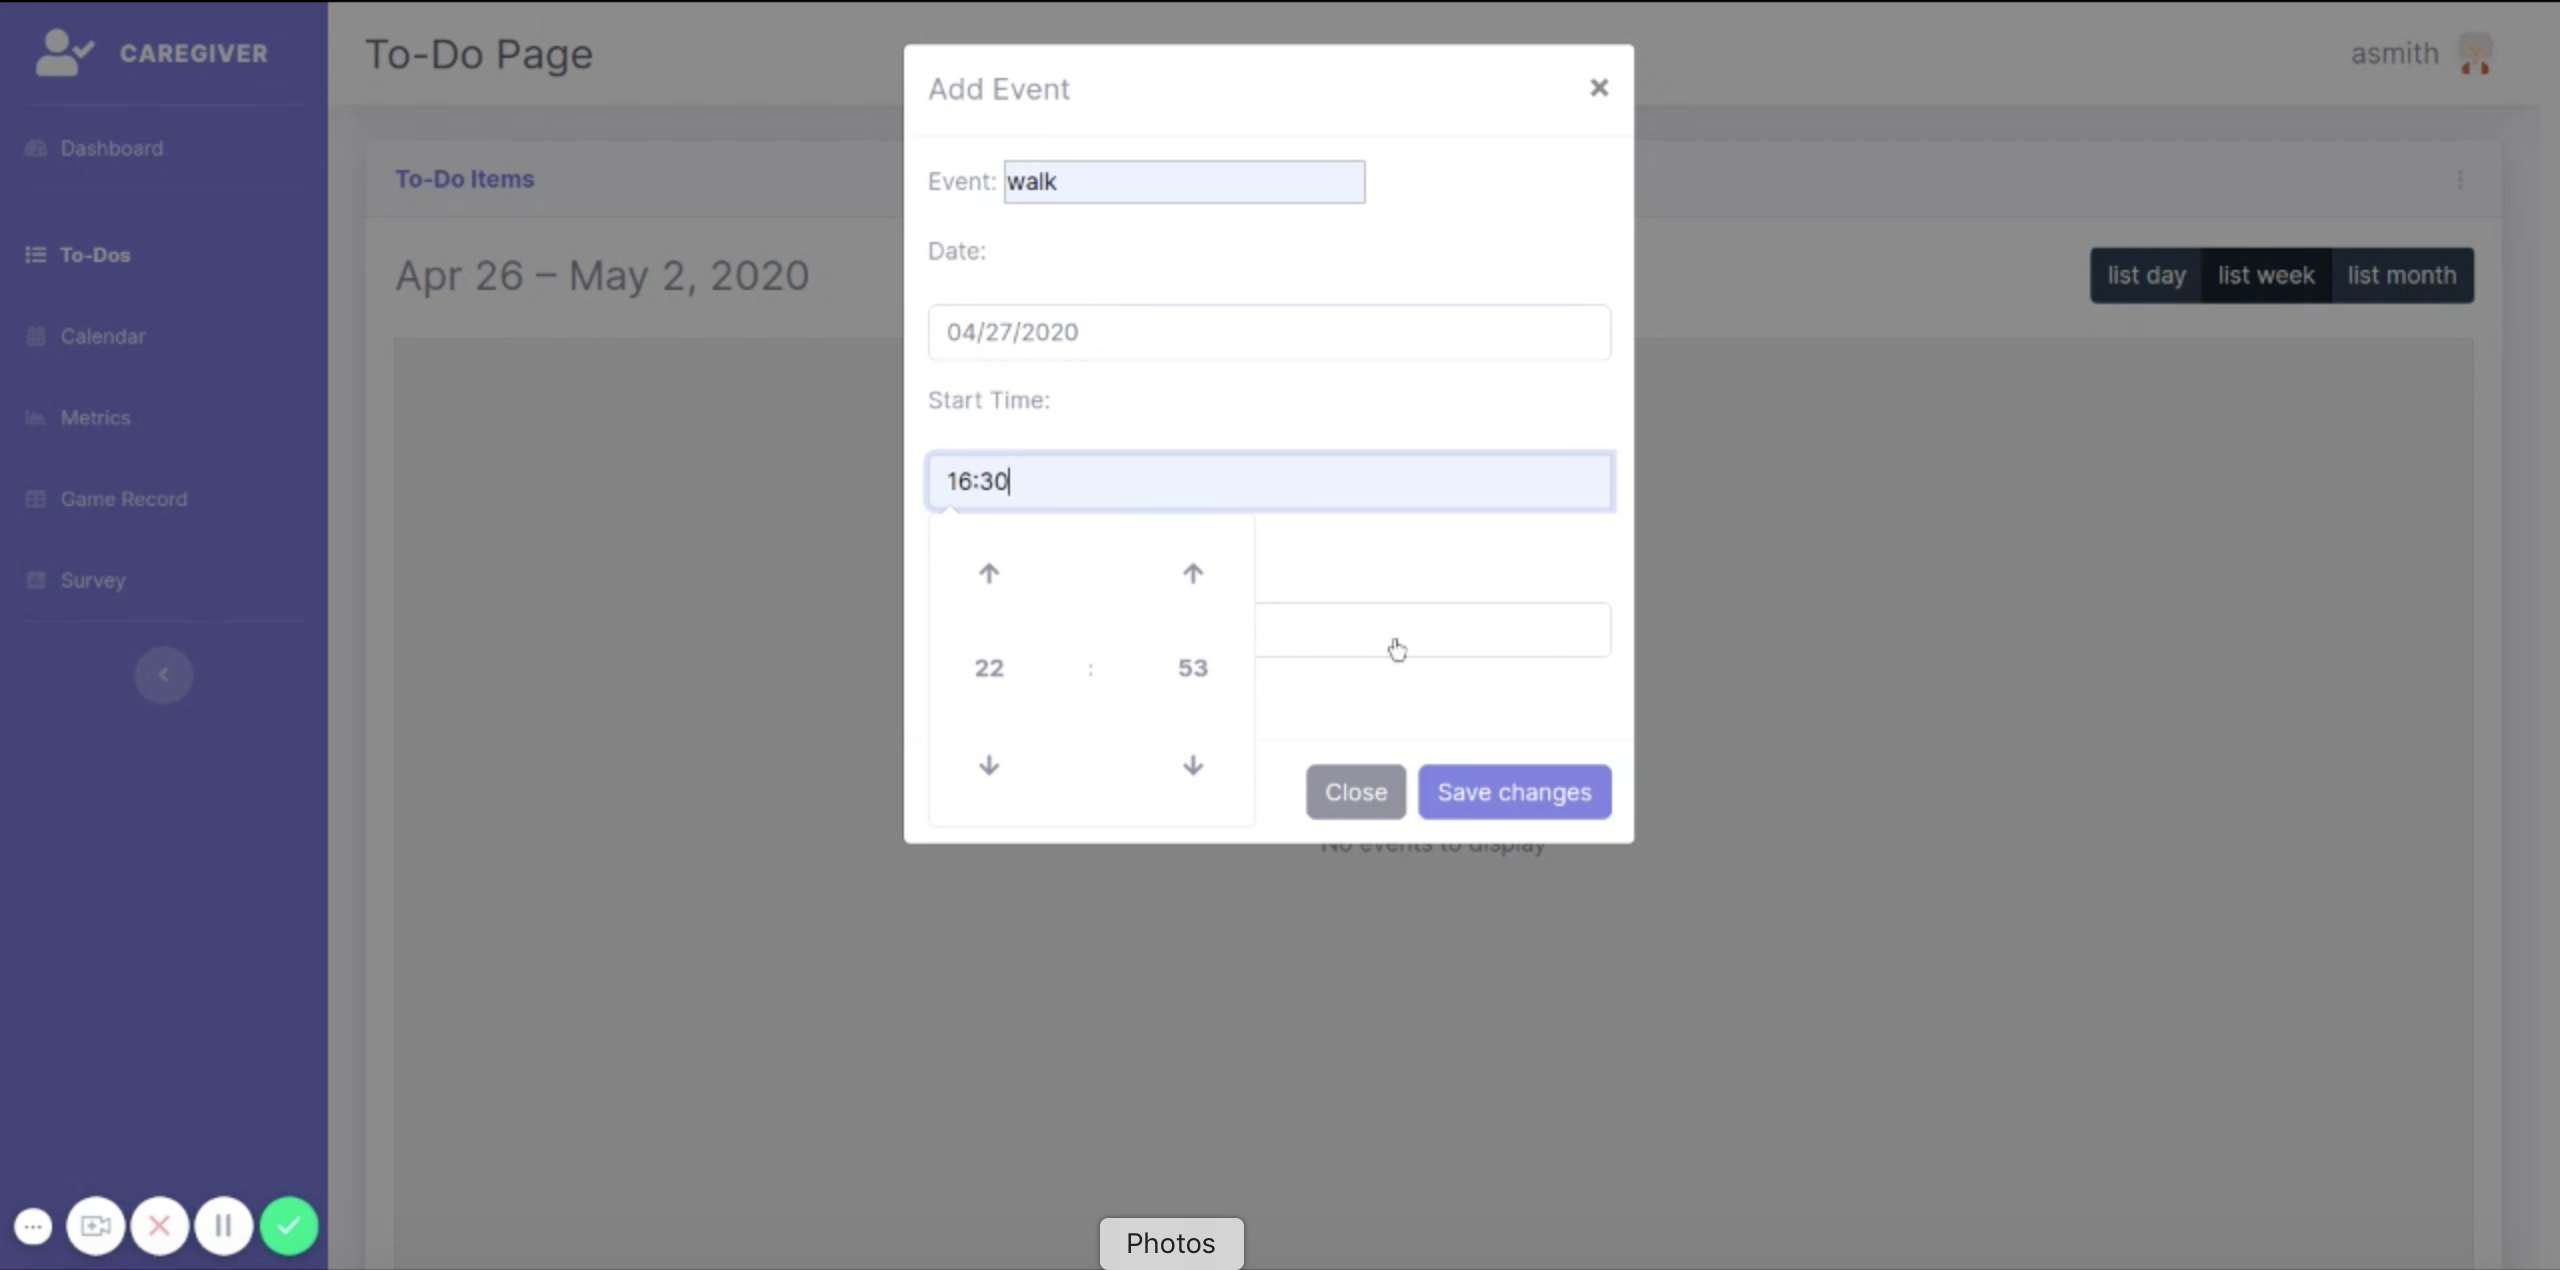
In the field below “Start Time:”, enter the time that the event will start by doing the following:
Click the field.
In the popup, set the hour value by clicking the up arrow on the left to increase the hour or the down arrow on the left to decrease it. Note that this uses a 24-hour clock.
In the popup, set the minute value by clicking the up arrow on the left to increase the minutes or the down arrow on the left to decrease them
When you have reached the desired time, either click anywhere outside of the popup, or press the “Enter” key on your keyboard.
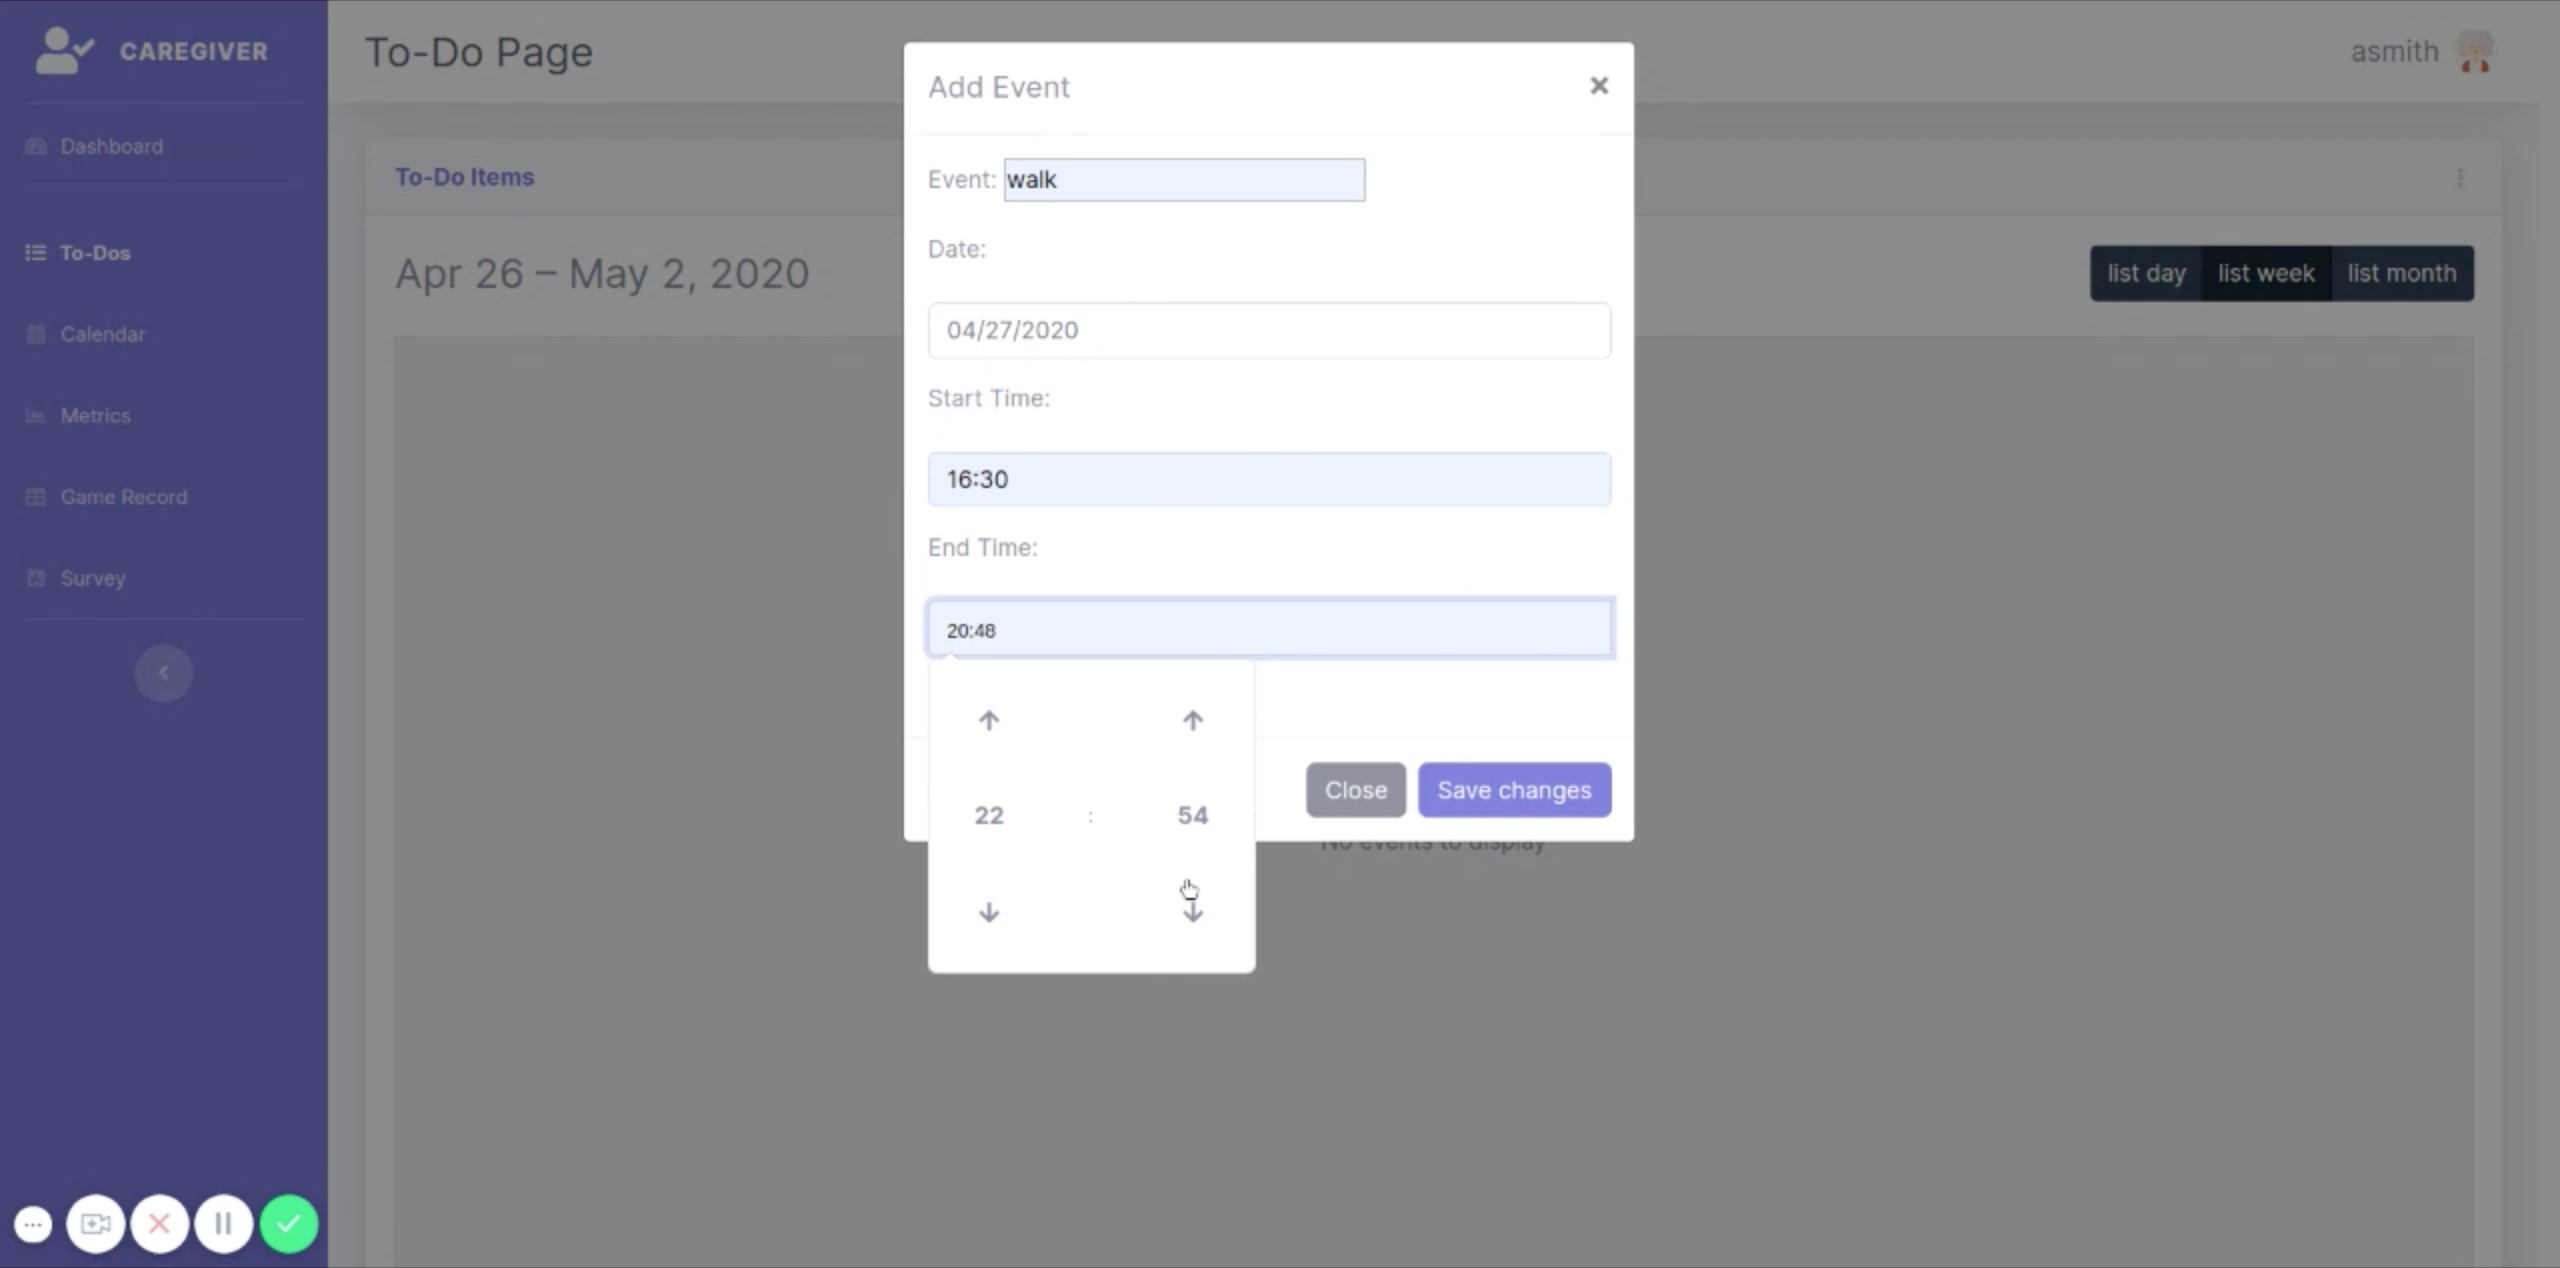
In the field below “End Time:”, enter the time that the event will end by following the same instructions as above.
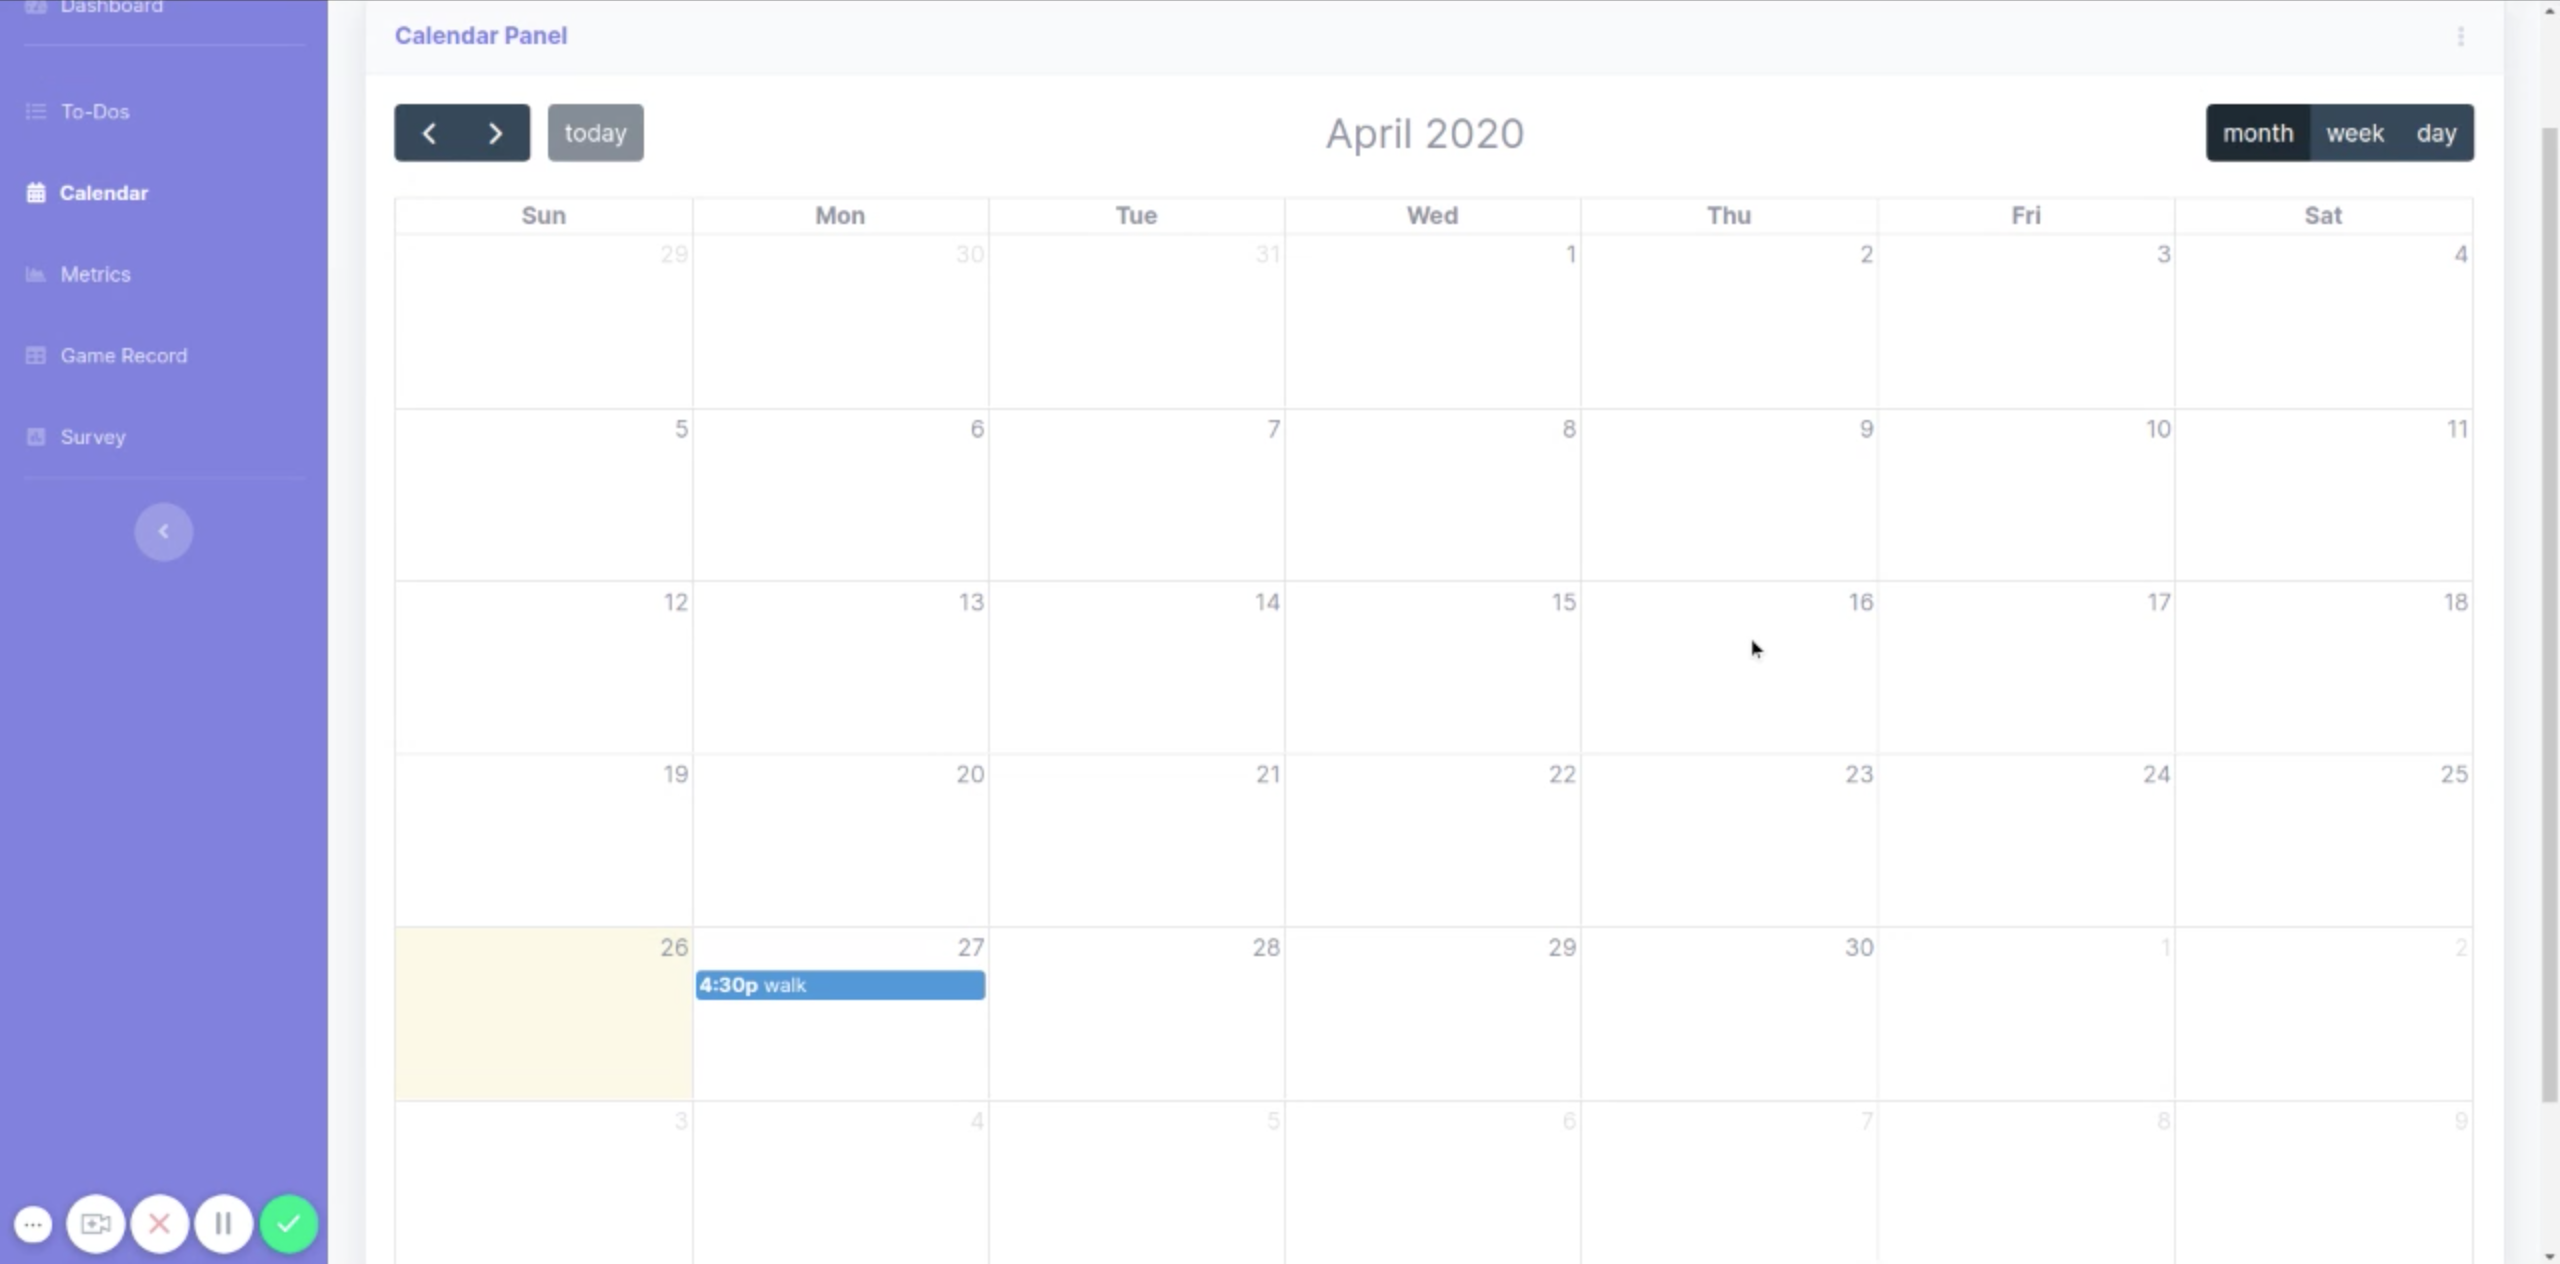
View Your Calendar
Step 1
On the left side of the screen, in the purple vertical bar, click “Calendar”
You can view your calendar for the day, week, or this month by toggling through the buttons located at the top right corner of the screen.
You can also view other days, weeks, or months by clicking through the arrows at the top left corner.
Return to today by clicking the “today” button at the top left of the calendar.
Set a Calendar Event
Step 1
Click on the day that you want to create your calendar event.
Set the event name, start time, and end time as prompted on the screen. Note that this uses a 24-hour clock.
Click on “Save Changes” to save this event.
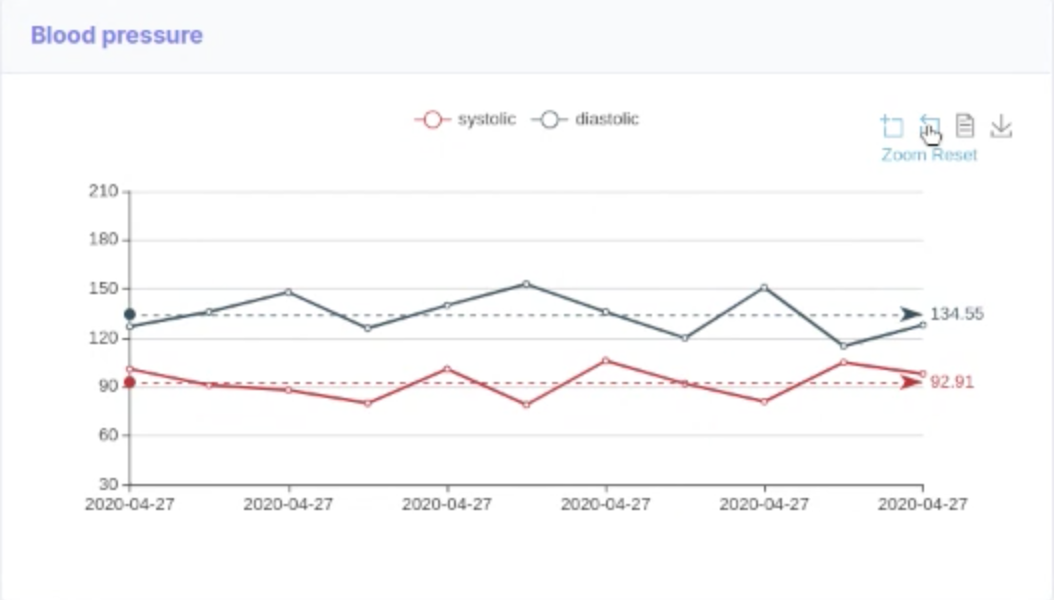
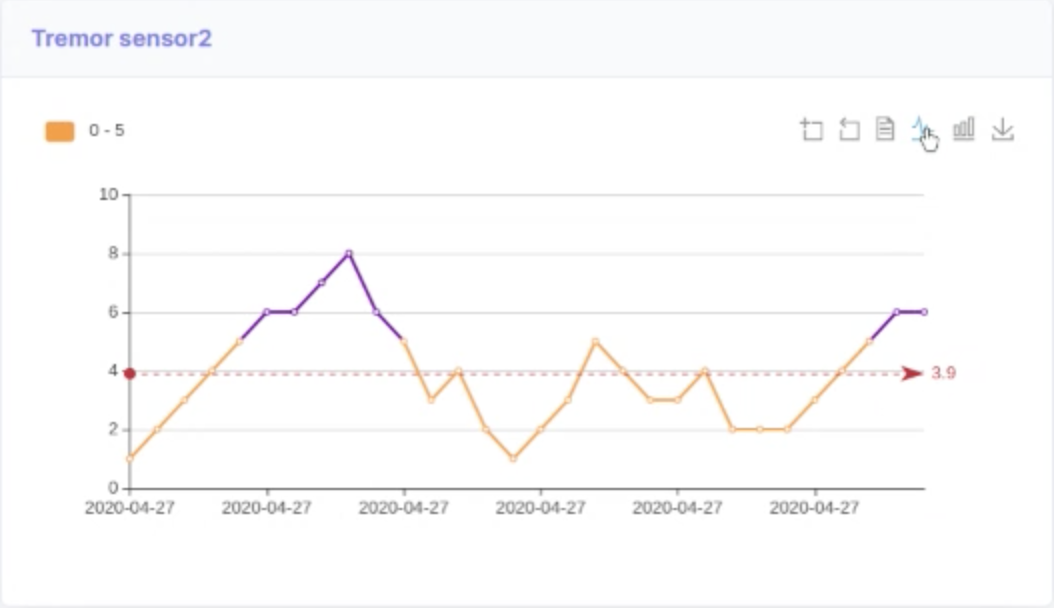
View your Care-Recipient’s Health Metrics
Step 1
On the left side of the screen, in the purple vertical bar, click “Metrics”
Step 2
Scroll down the page to see all of your care-recipient’s metrics.
To learn more about any data point, hover over the part of a given graph that you are interested in. Information will be displayed in a translucent, black textbox.
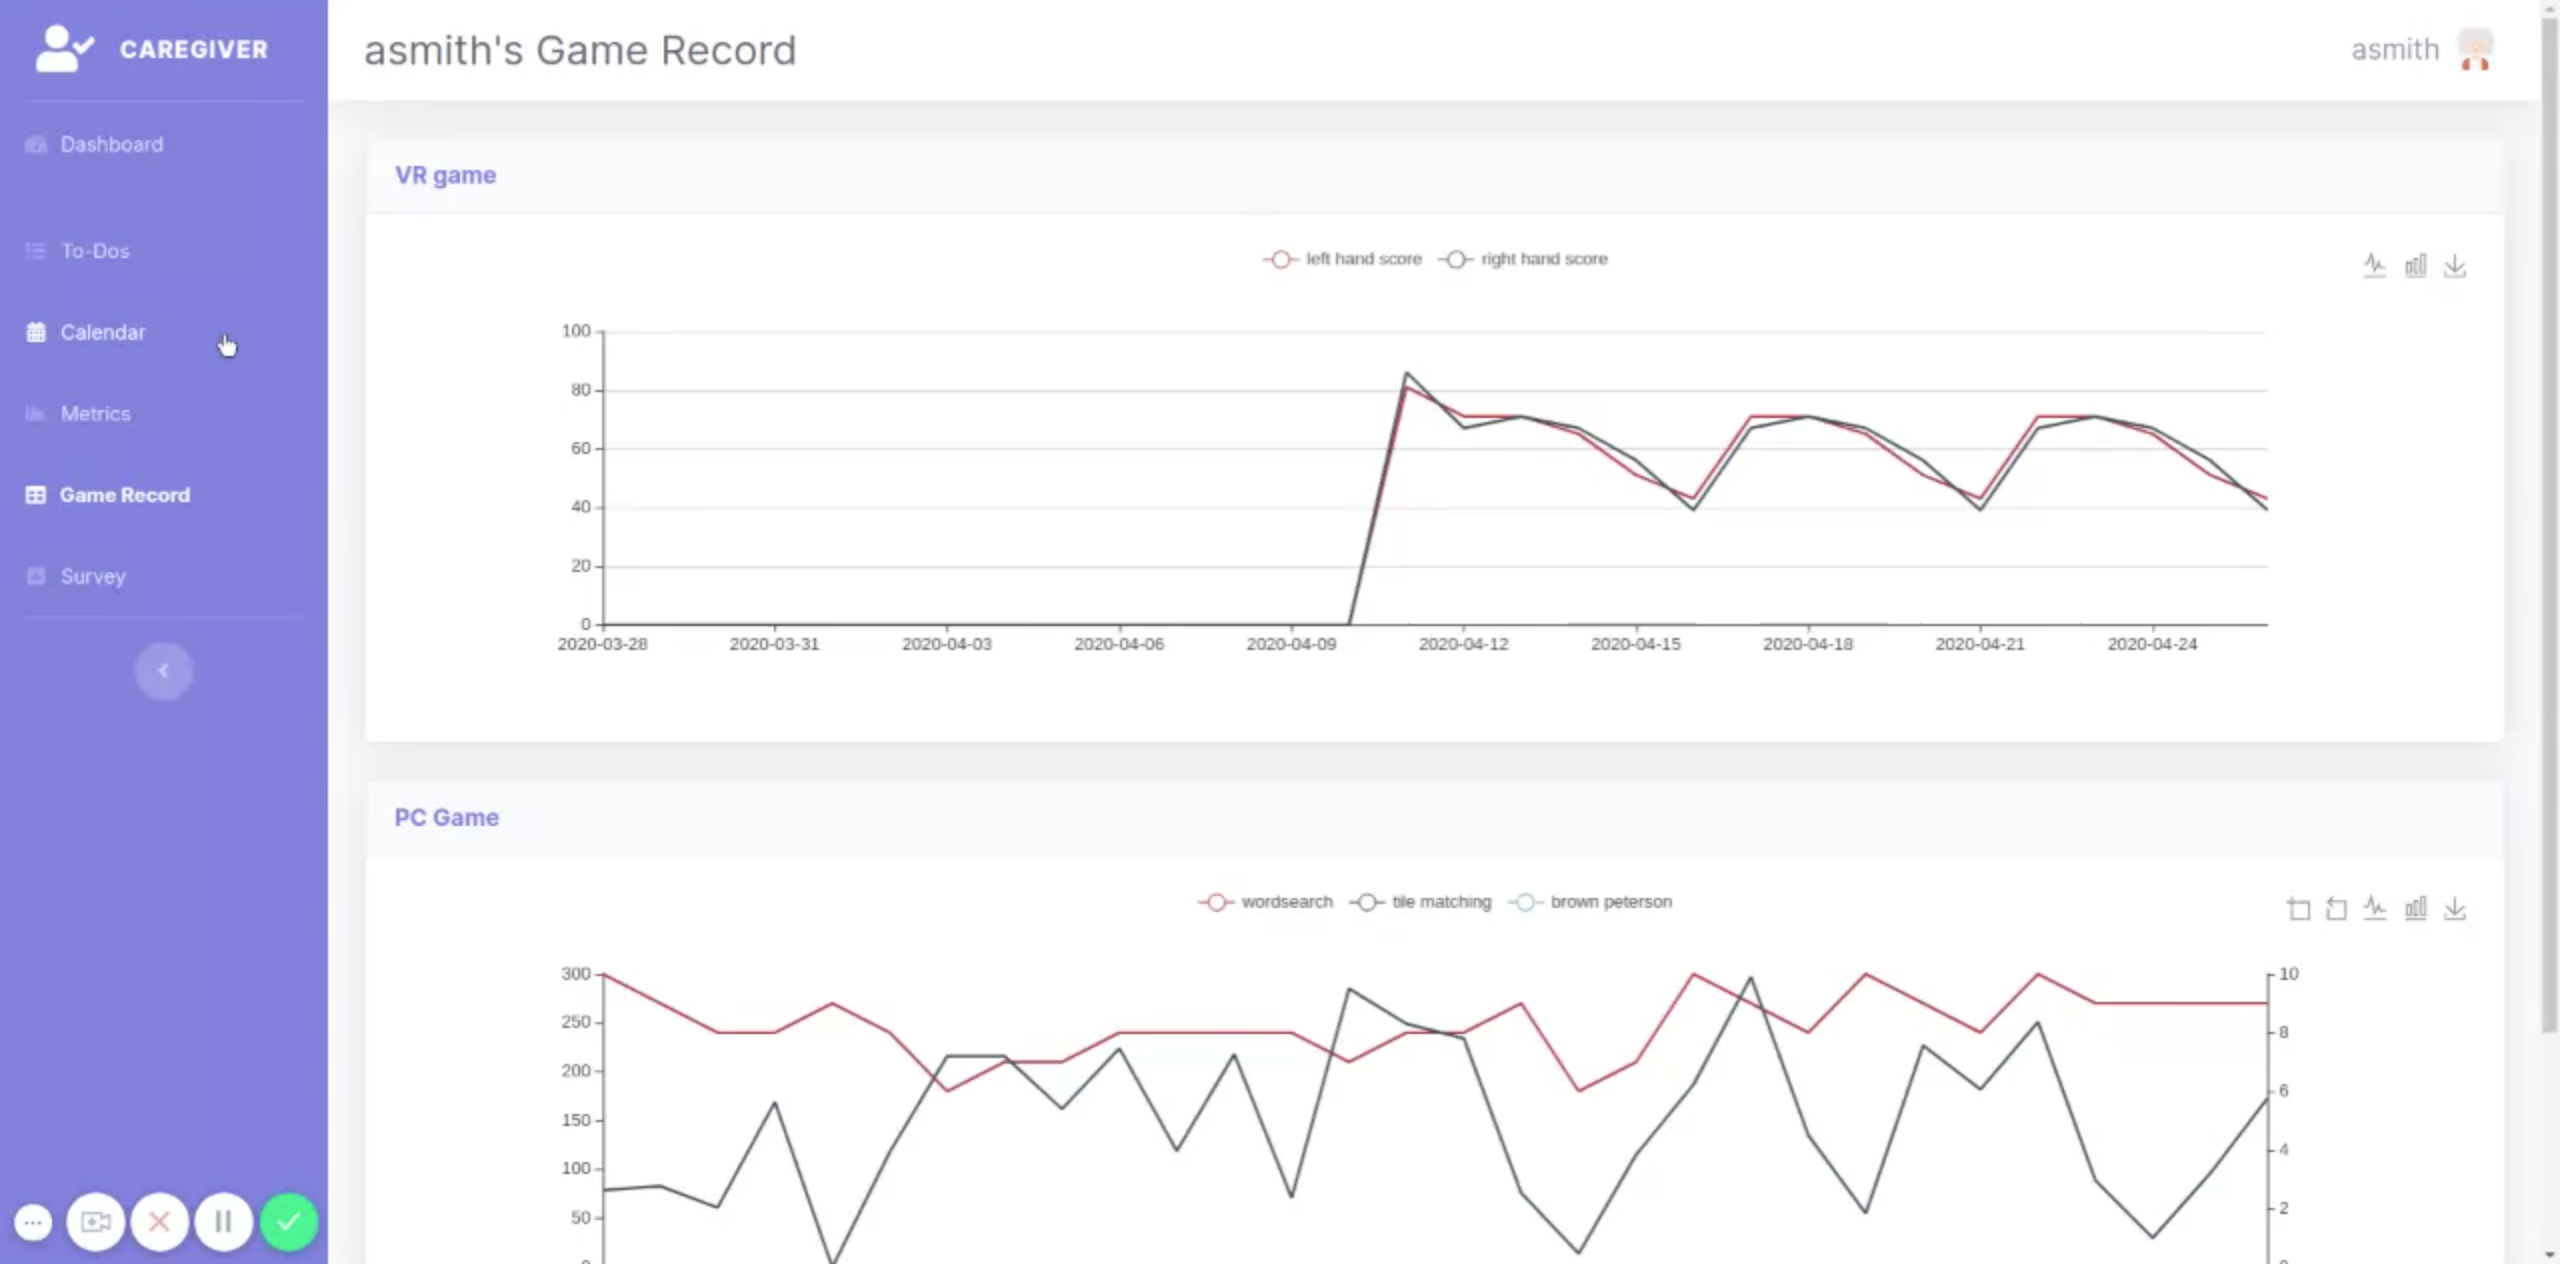
View your Care-Recipient’s Game Records
Step 1
On the left side of the screen, in the purple vertical bar, click “Game Record”
Step 2
Scroll down the page to see all of your care-recipient’s game records
To learn more about any data point, hover over the part of a given graph that you are interested in. Information will be displayed in a translucent, black textbox.
Change Graph Type
Some metrics and game records may be viewed through a variety of different graphs. Instructions to change to each possible type of graph are listed here.
Save a Graph
On the Metrics or Game Record page, find the graph that you wish to save.
Towards the top right of the graph, click the “Save as Image” icon, shaped like a downward-pointing arrow
In the window that appears, click “Save”
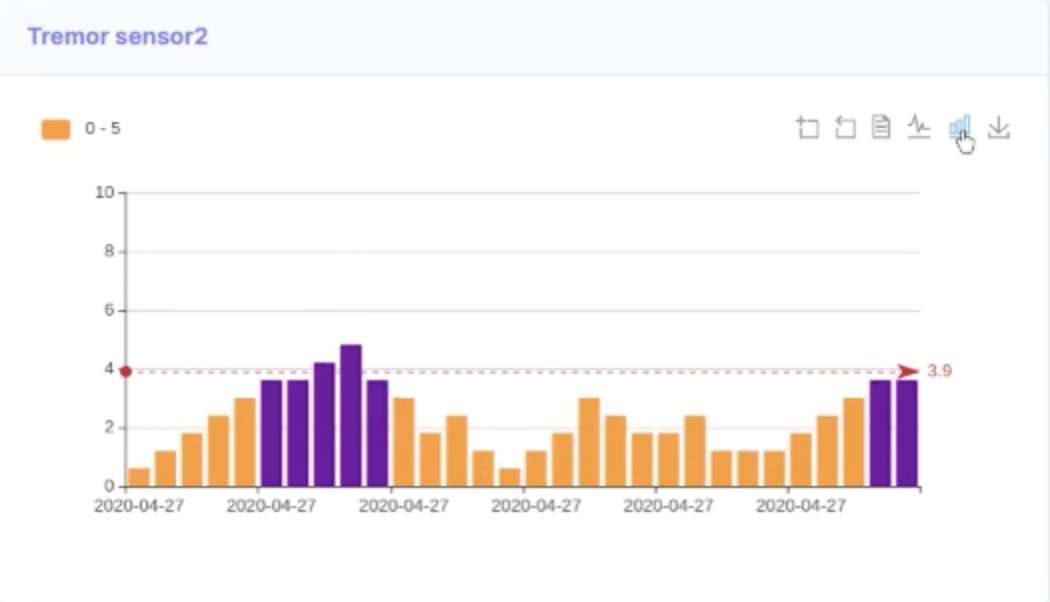
Change to Bar Chart
Above and to the right of the graph, locate and click on the “Switch to Bar Chart” icon, shaped like three vertical rectangles above a horizontal line.
Change to Line Chart
Above and to the right of the graph, locate and click on the “Switch to Line Chart” icon, shaped like a jagged line above a horizontal line.
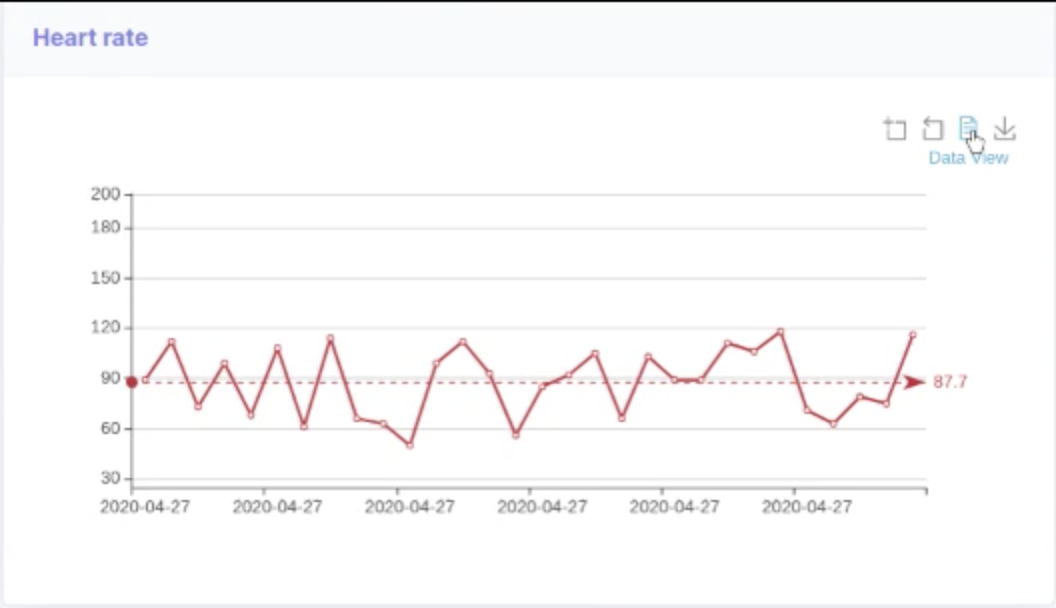
Change to Data View
Above and to the right of the graph, locate and click on the “Data View” icon, shaped like a lined piece of paper.
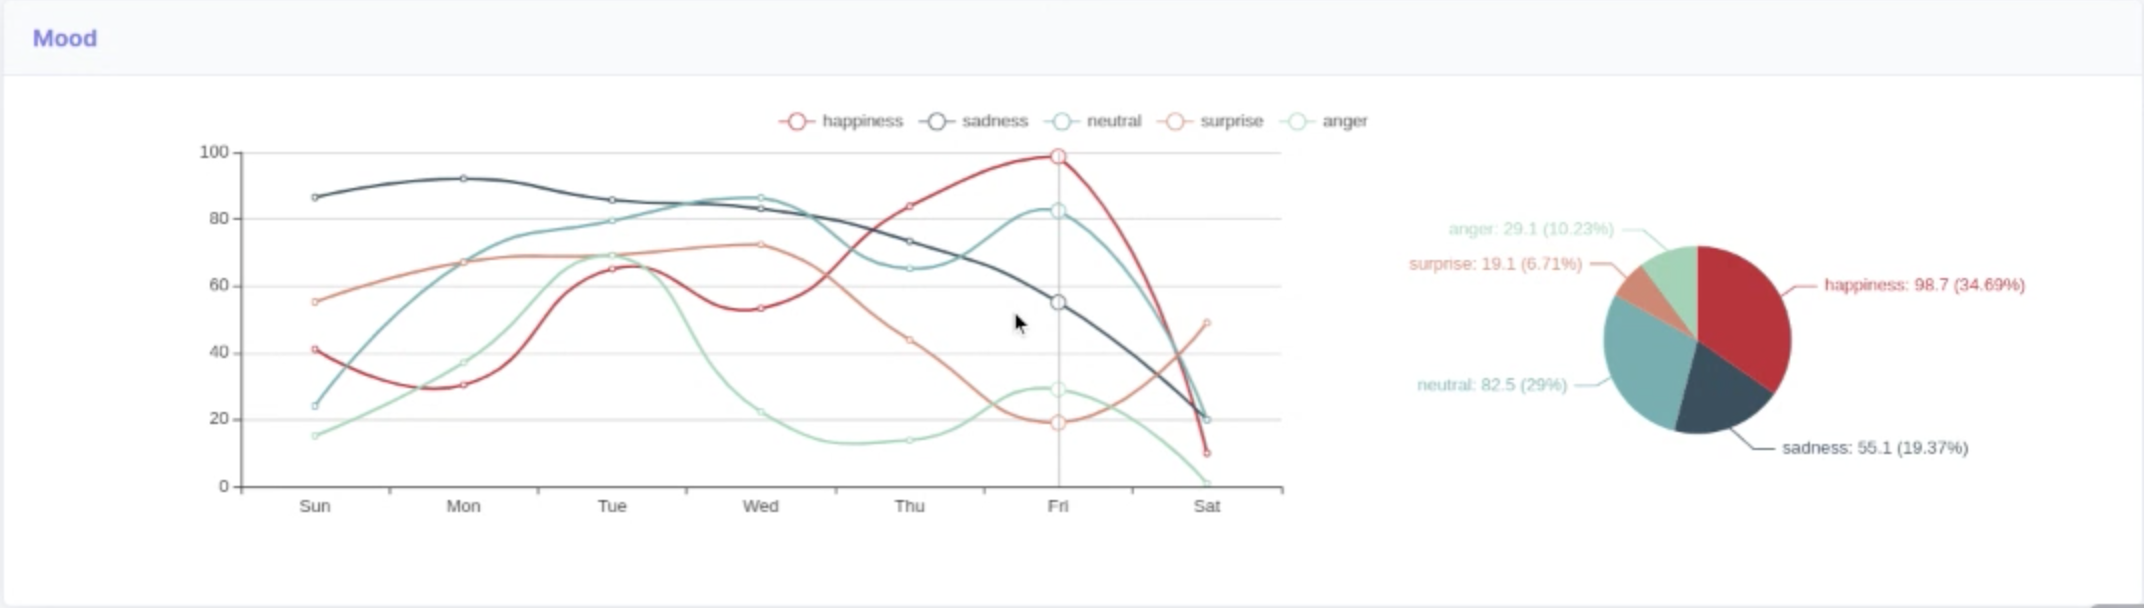
Toggle Displayed data points
Some graphs show multiple kinds of data. You can choose to show or hide different data points.
Above the graph, locate the names of the different kinds of data, each of which is displayed next to an icon that looks like a white circle over a horizontal line.
Click on the name or icon. If that data is currently being displayed, clicking on it will hide it. If it is currently hidden, clicking on it will cause it to reappear.
Complete Survey Questions
Some physicians may recommend that you, as a caregiver, fill survey questions, as well as your care-recipient. Follow the instructions below if you received this recommendation. If you are unsure, please speak to your care-recipient’s physician.
Step 1
On the left side of the screen, in the purple vertical bar, click “Survey”
Step 2
For each item on the page, click on the answer that most appropriately describes how much trouble your care-recipient has had with that survey item since you last completed a survey. For example, if they have fallen very frequently, you might select “5” for Falls. If they have not had any issues with thinking, you might select “0” for Thinking.
When you have finished, click “Submit Survey” at the bottom of the screen.
